Tech Conference Event
Follow this step-by-step guide to build and customize your application using Planby Now:
info
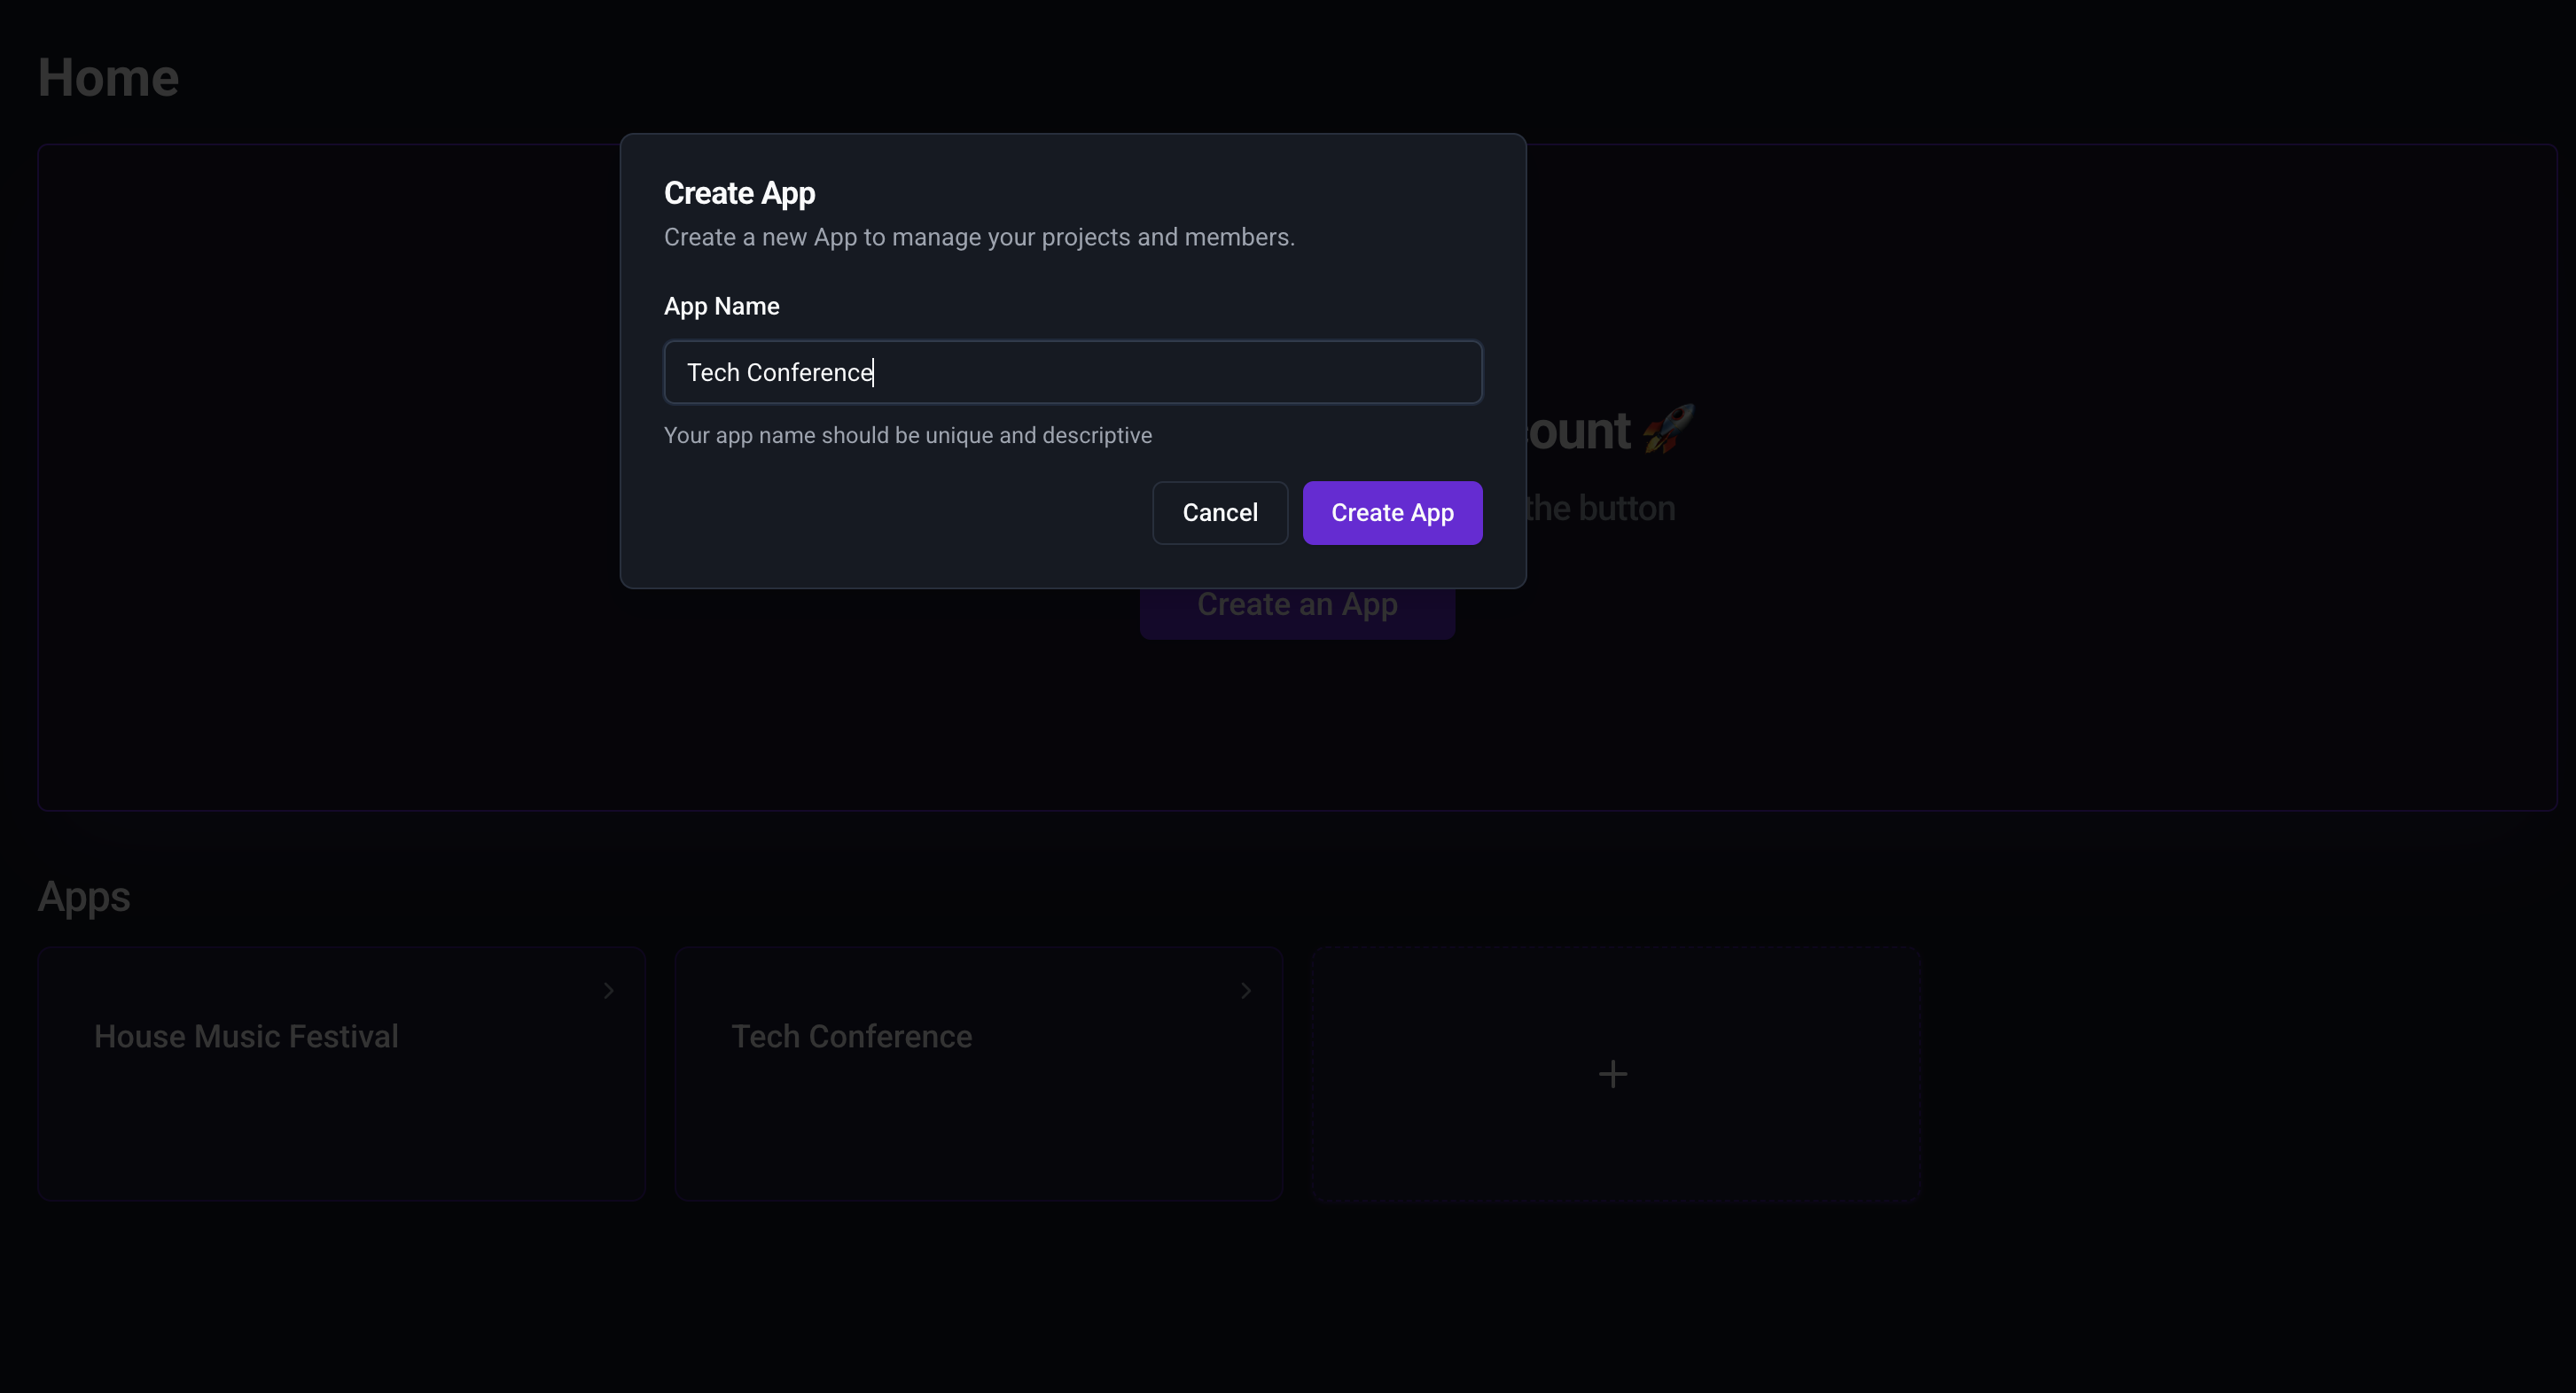
Step 1: Create an Application
-
Go to the Home Page.
-
Click Create an App and provide a name for your application.
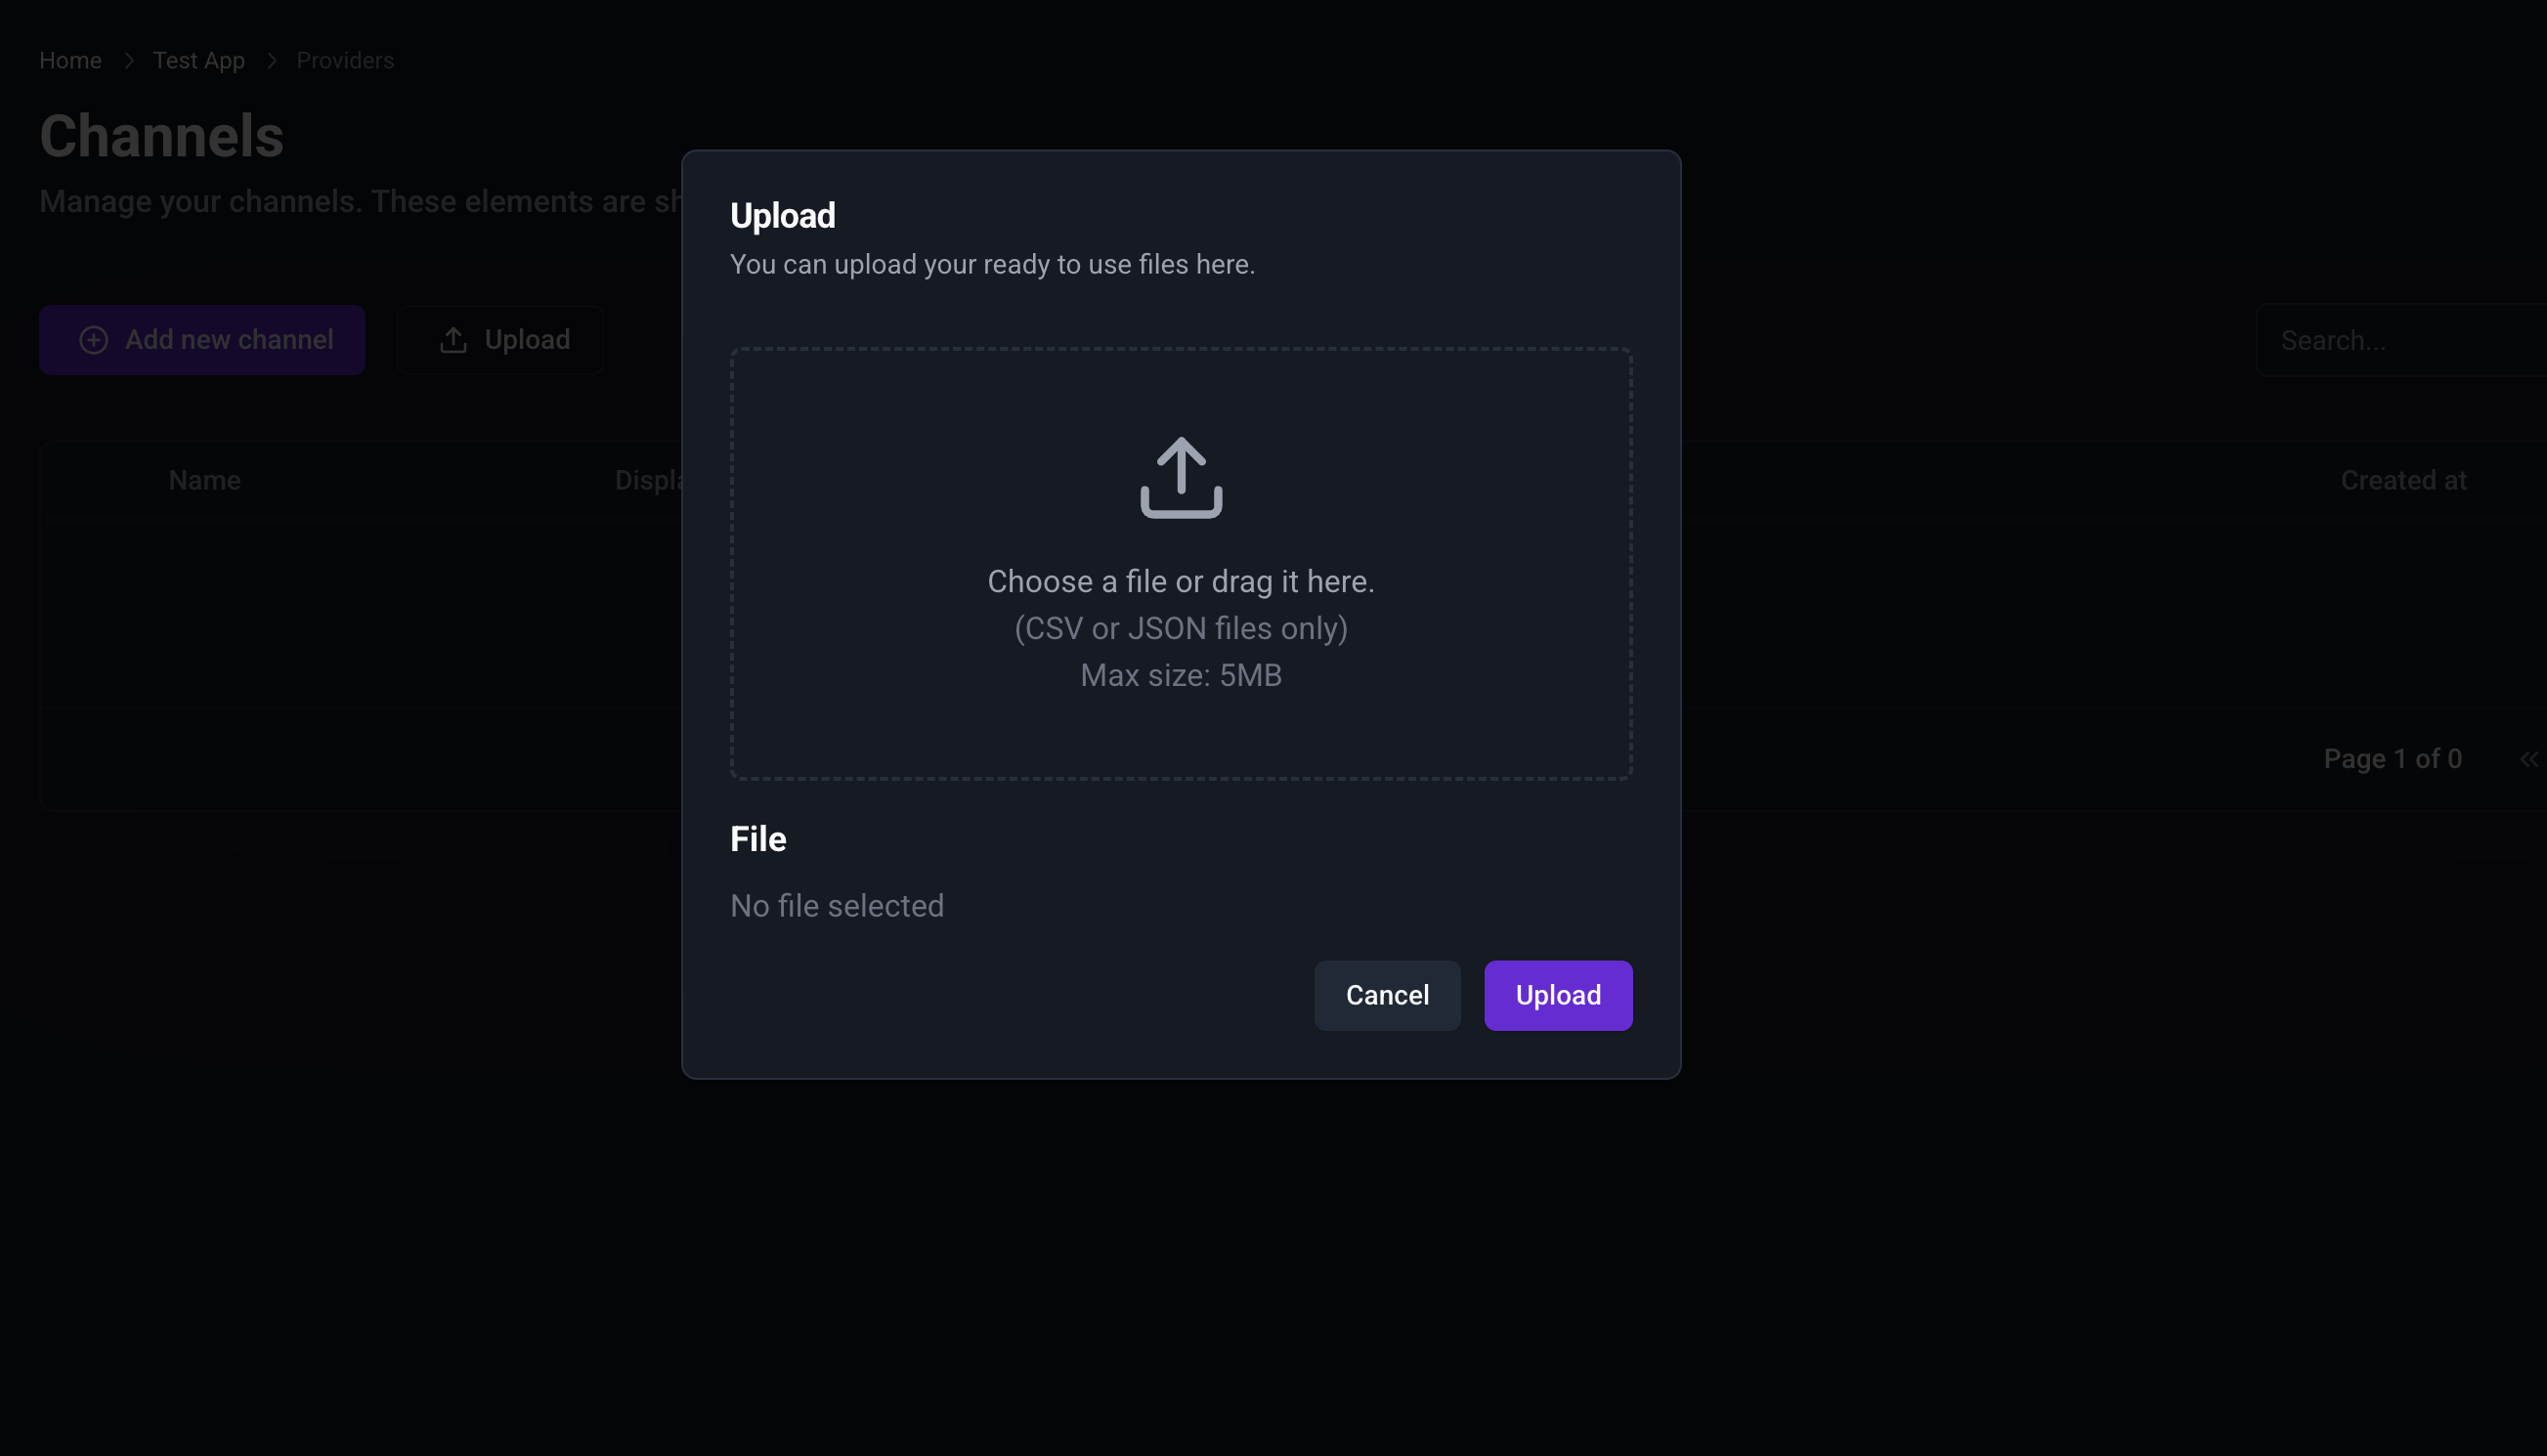
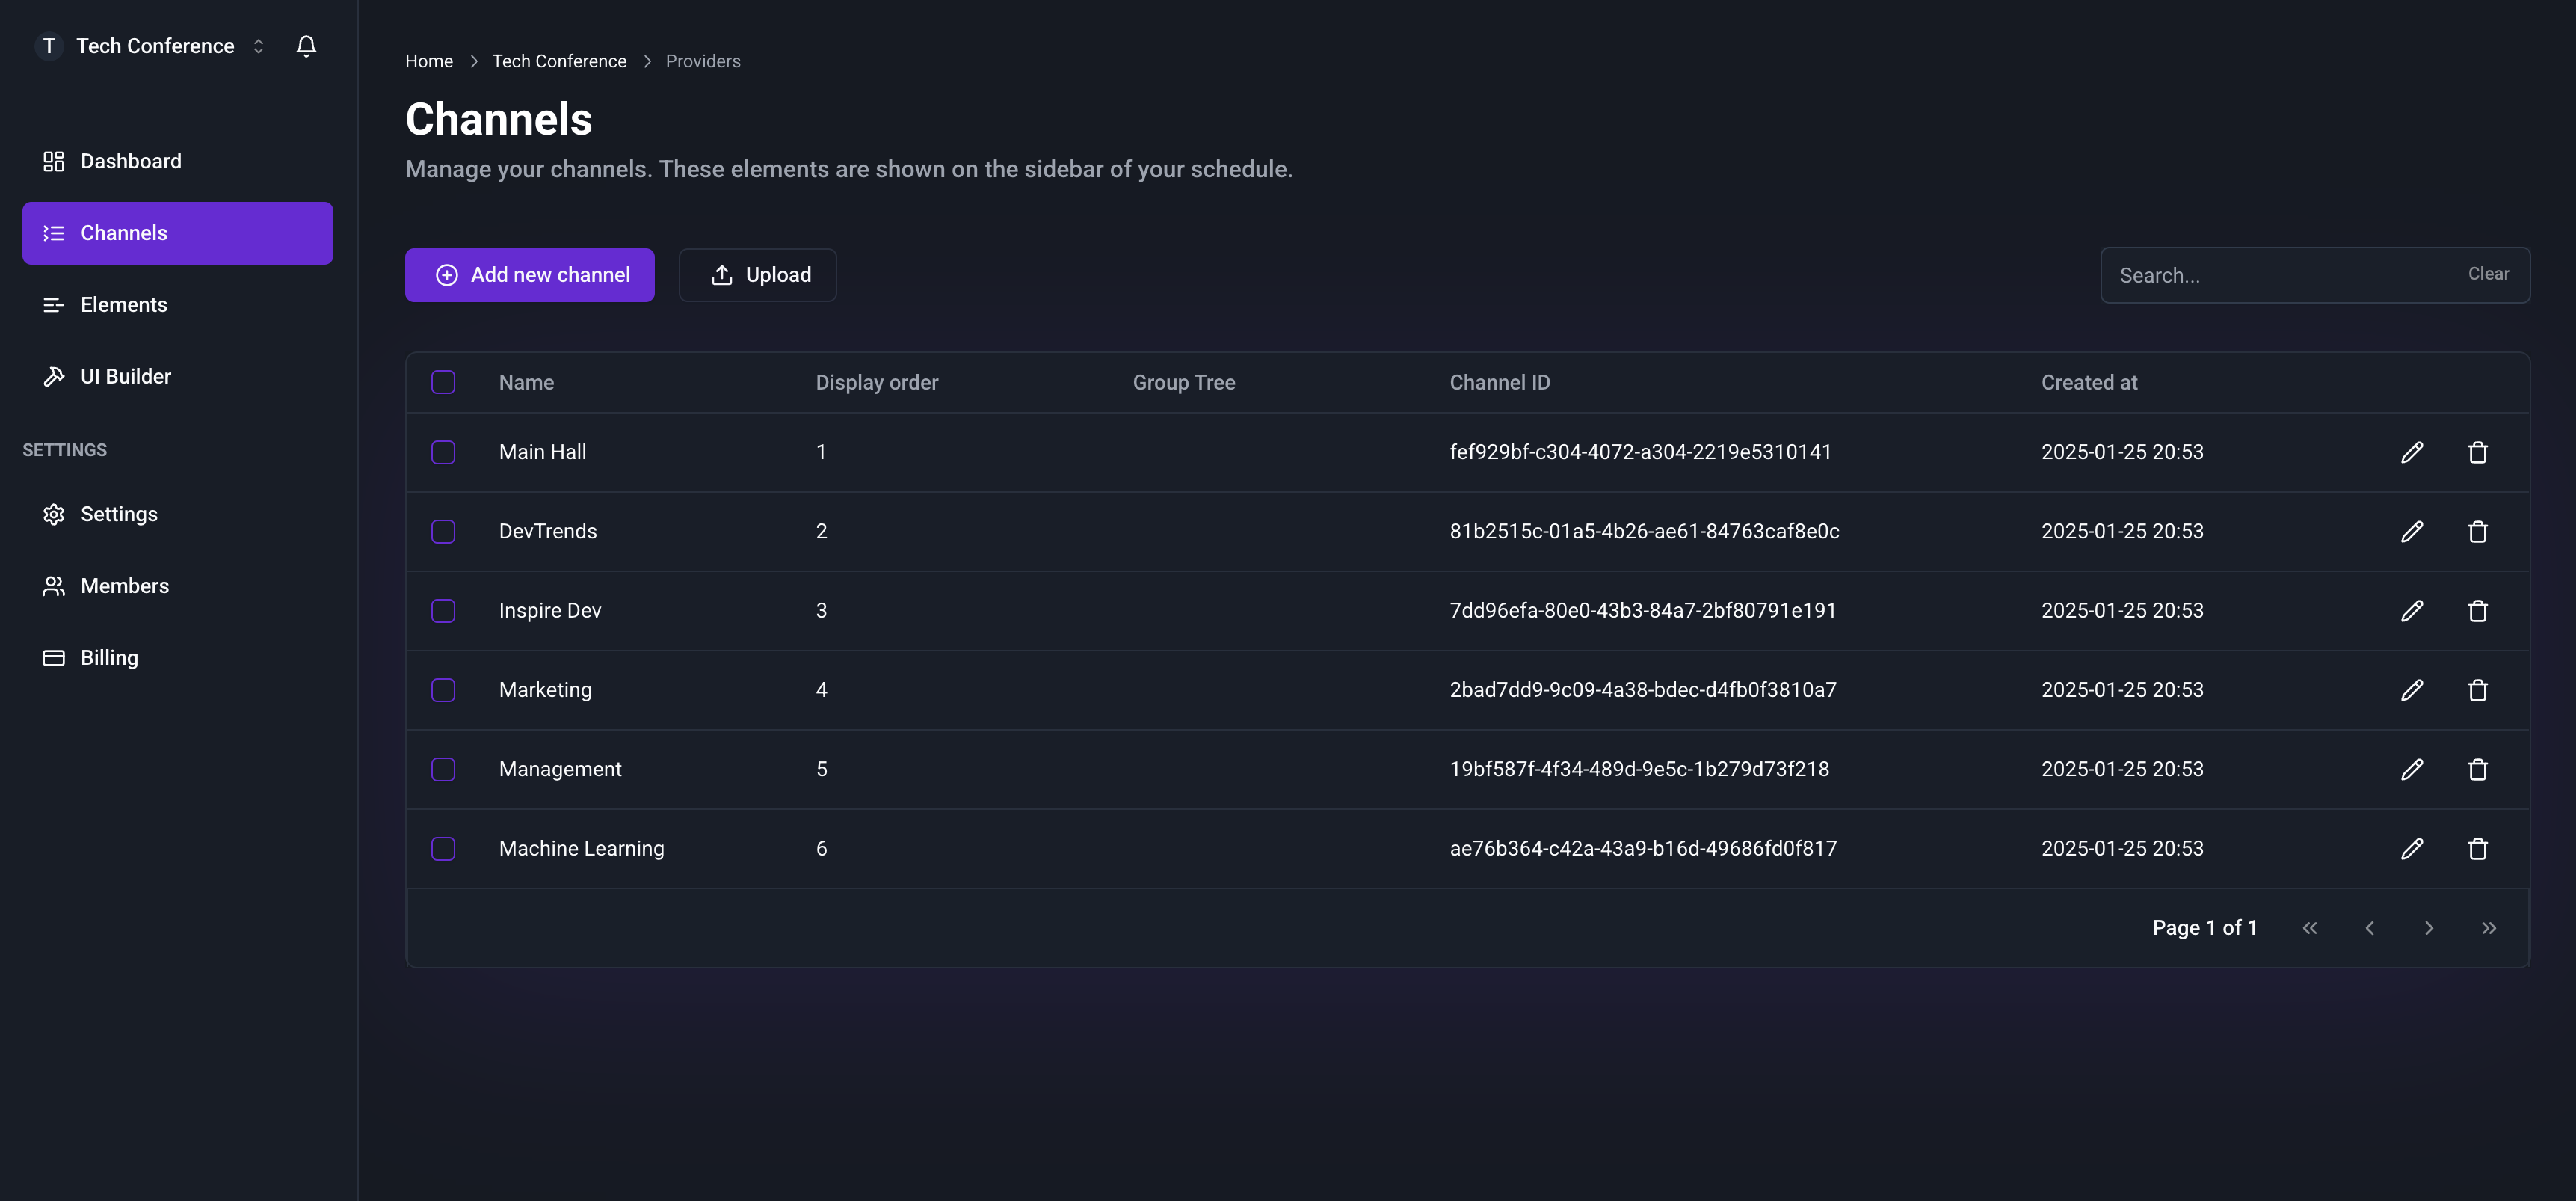
Step 2: Upload Data in the Channels Tab
-
Navigate to the Channels tab.
-
Upload your data using the provided uploader.
- You can download example data from this link.
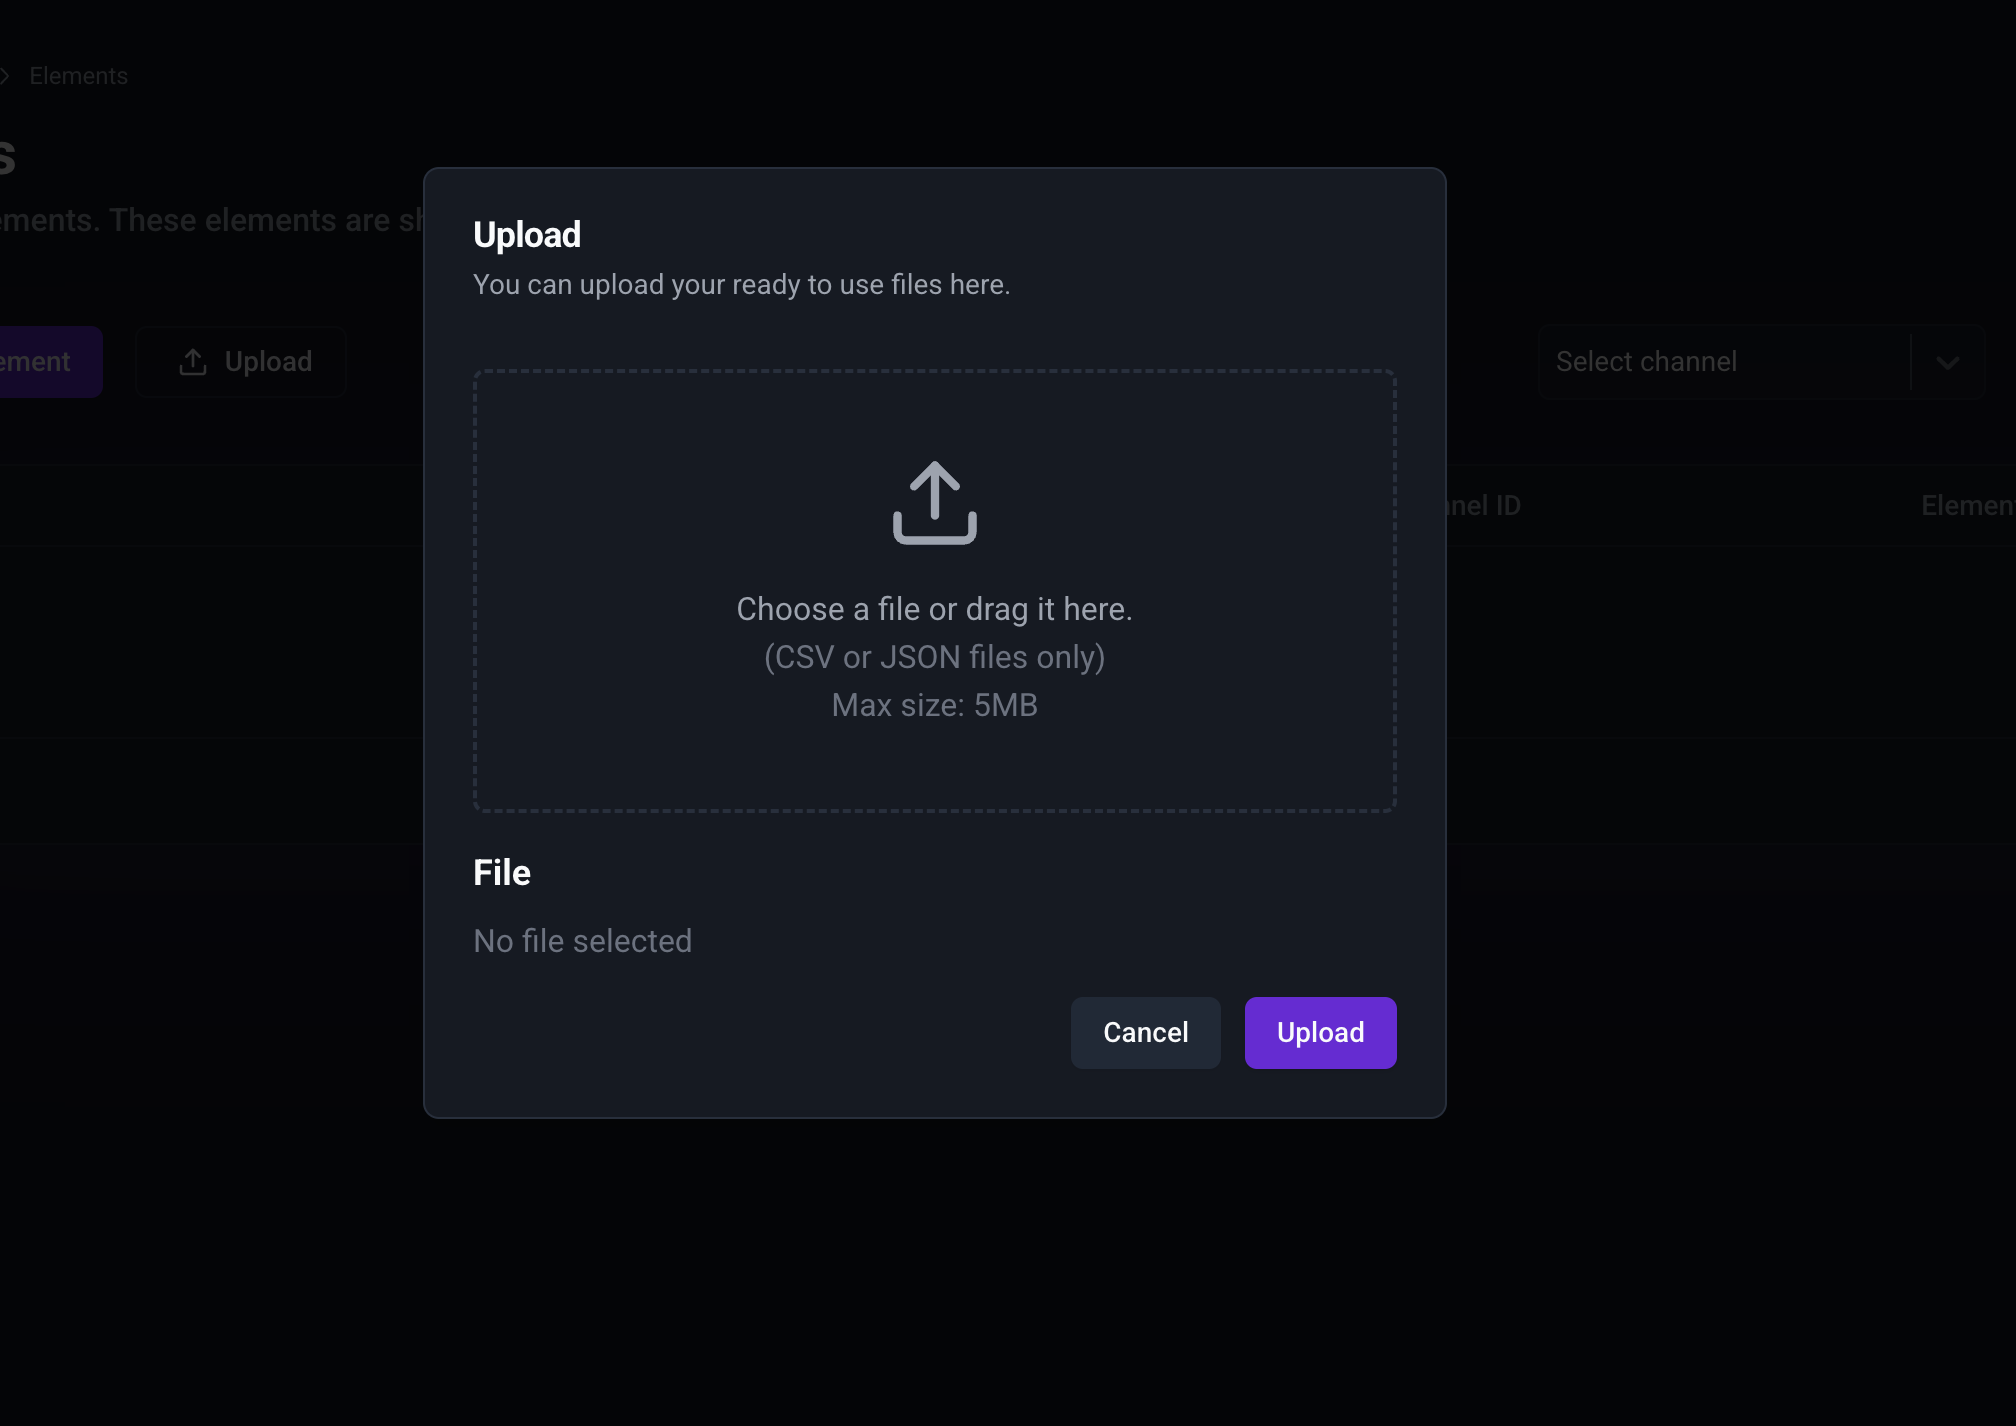
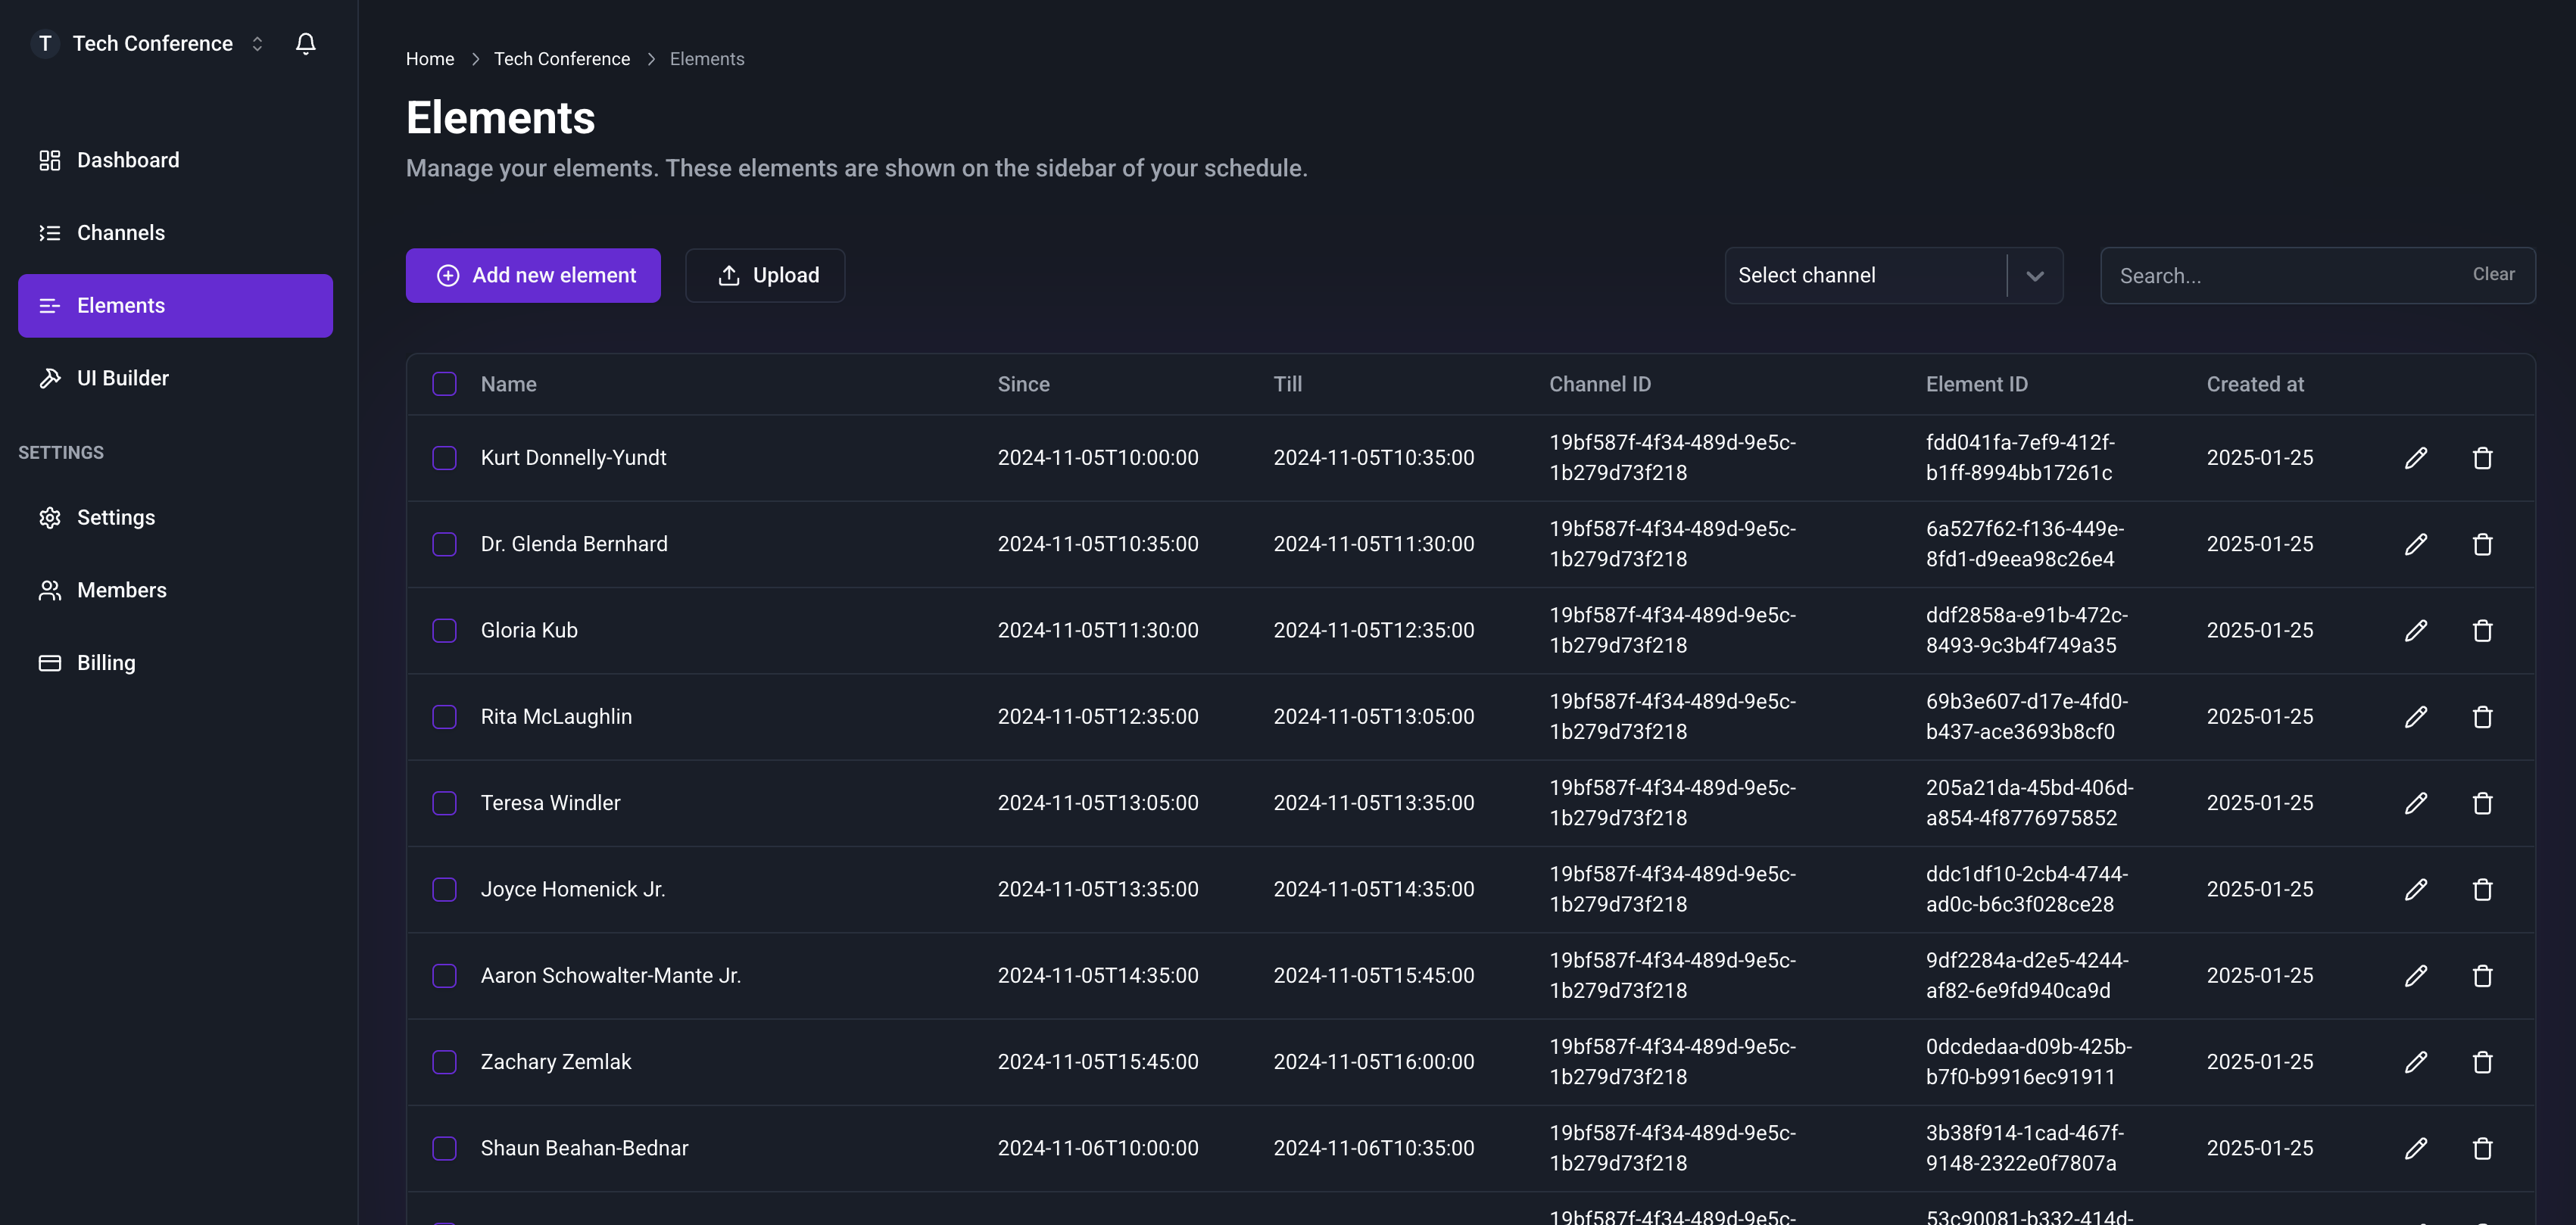
Step 3: Upload Data in the Elements Tab
- Go to the Elements tab.
- Upload your data similarly to how you did in the Channels tab from this link.
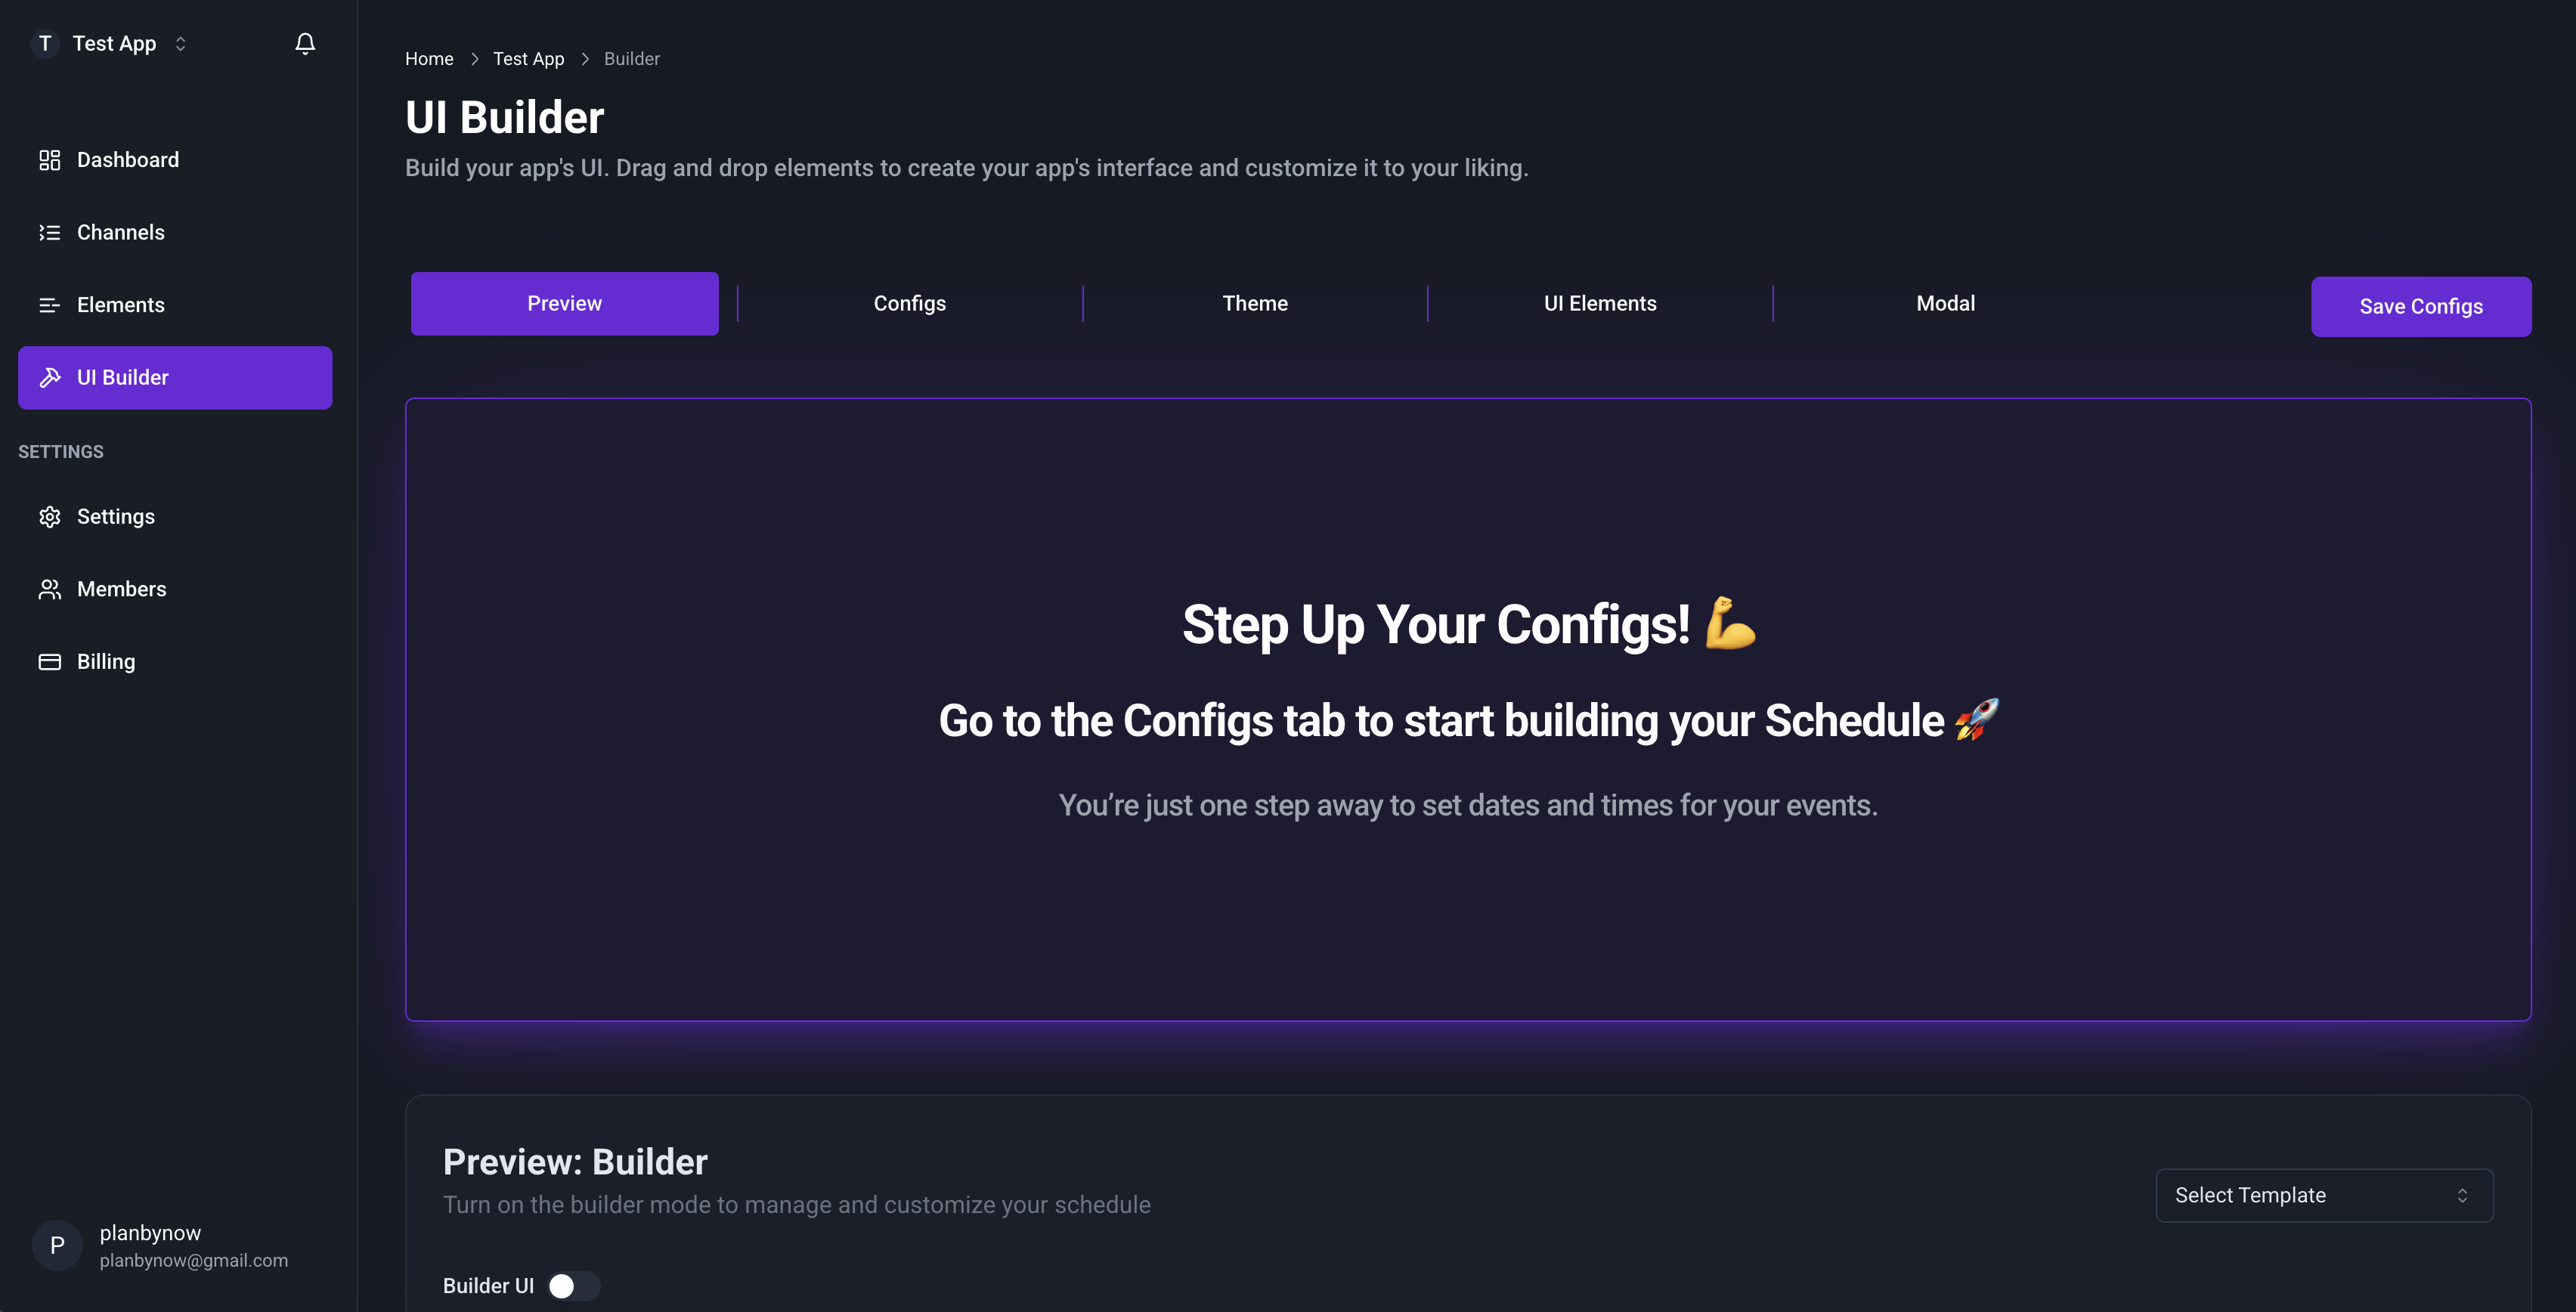
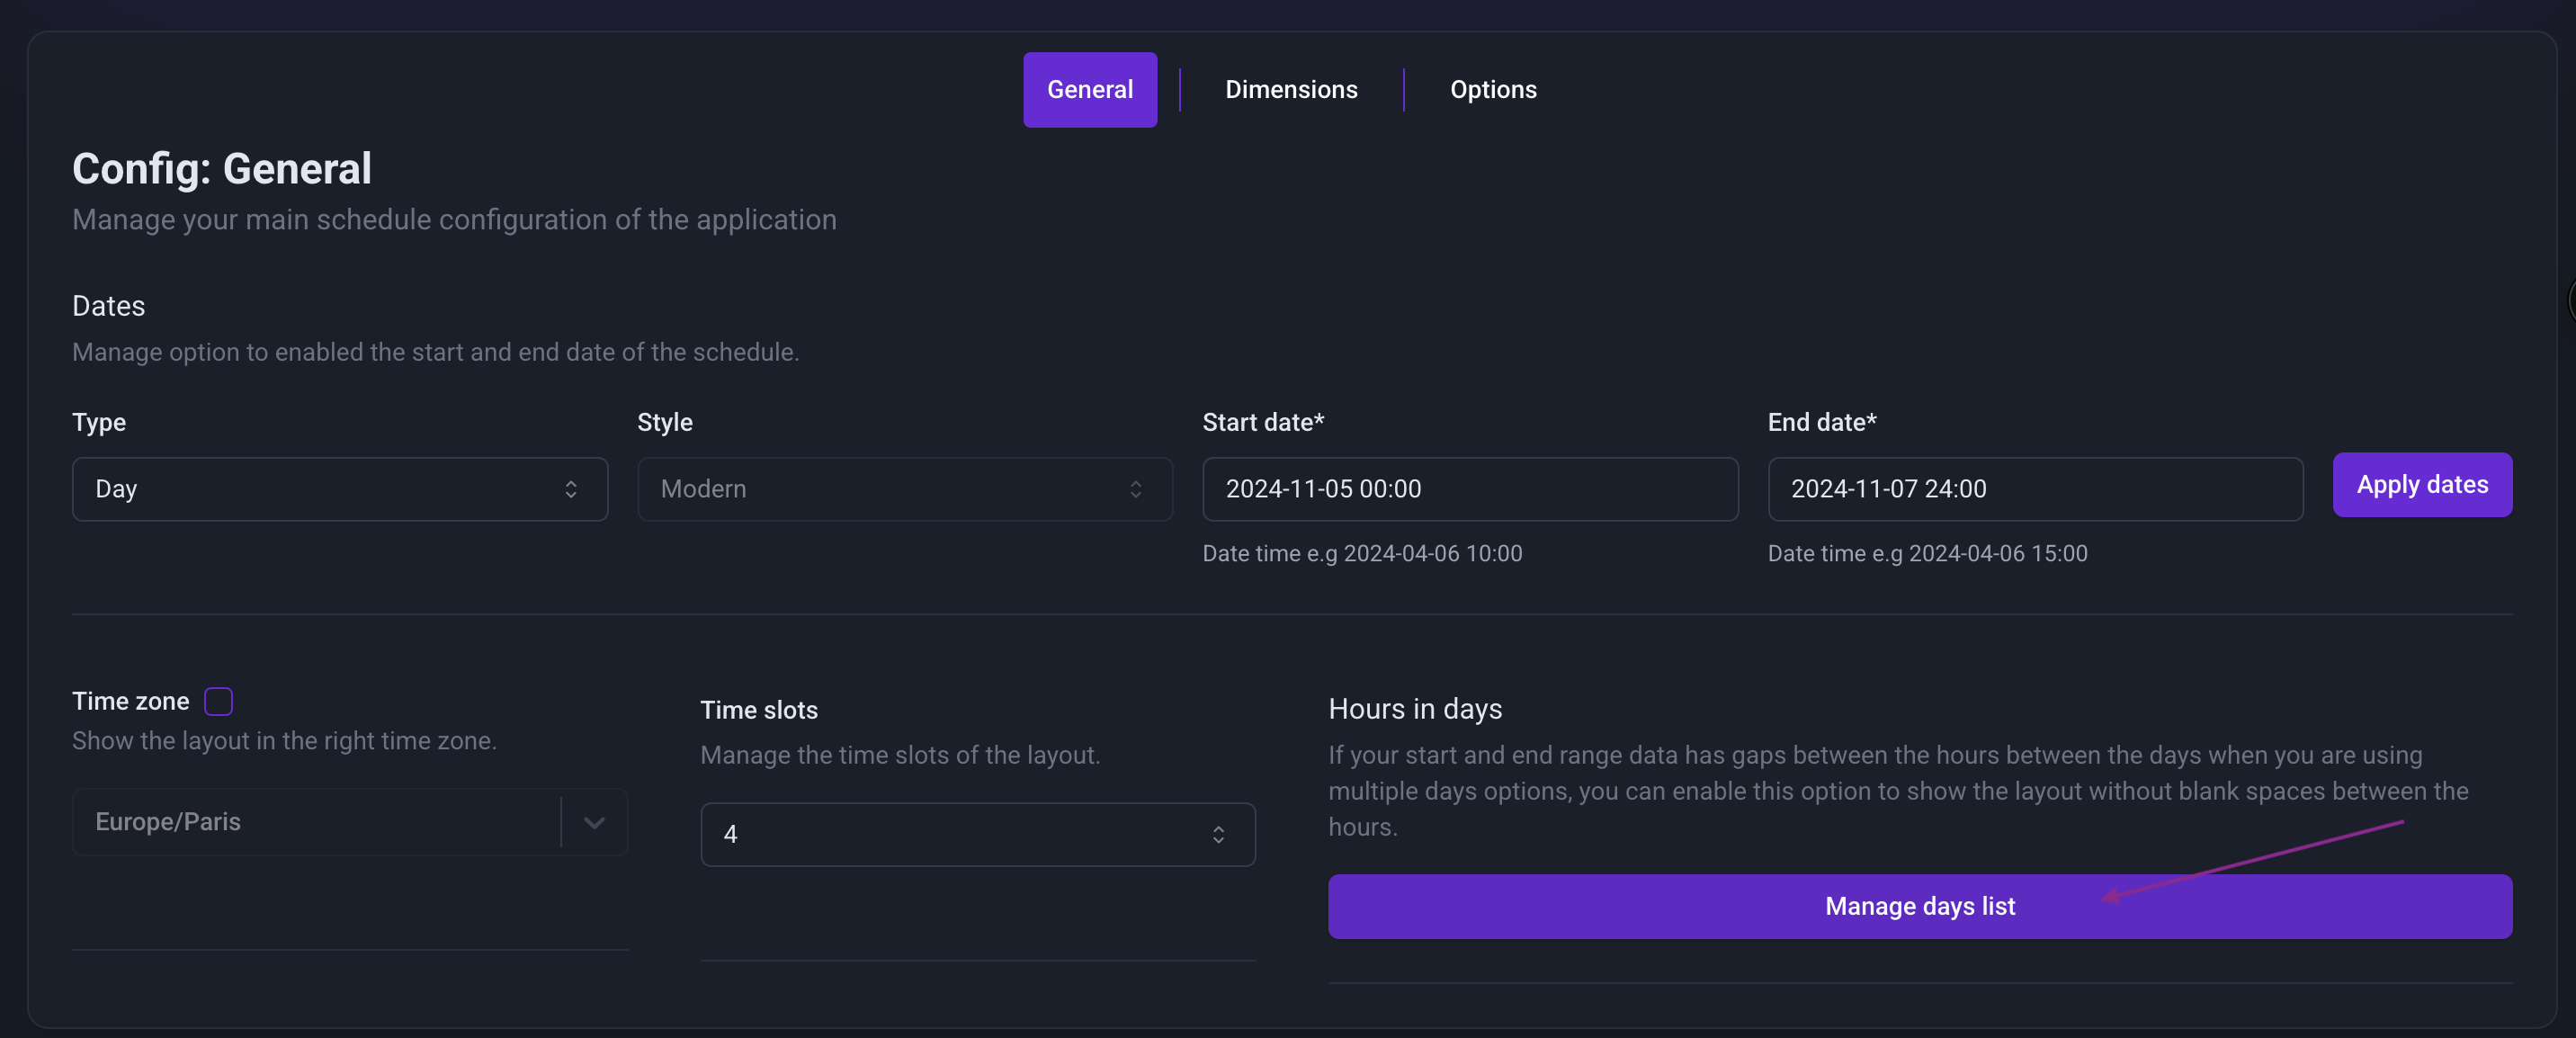
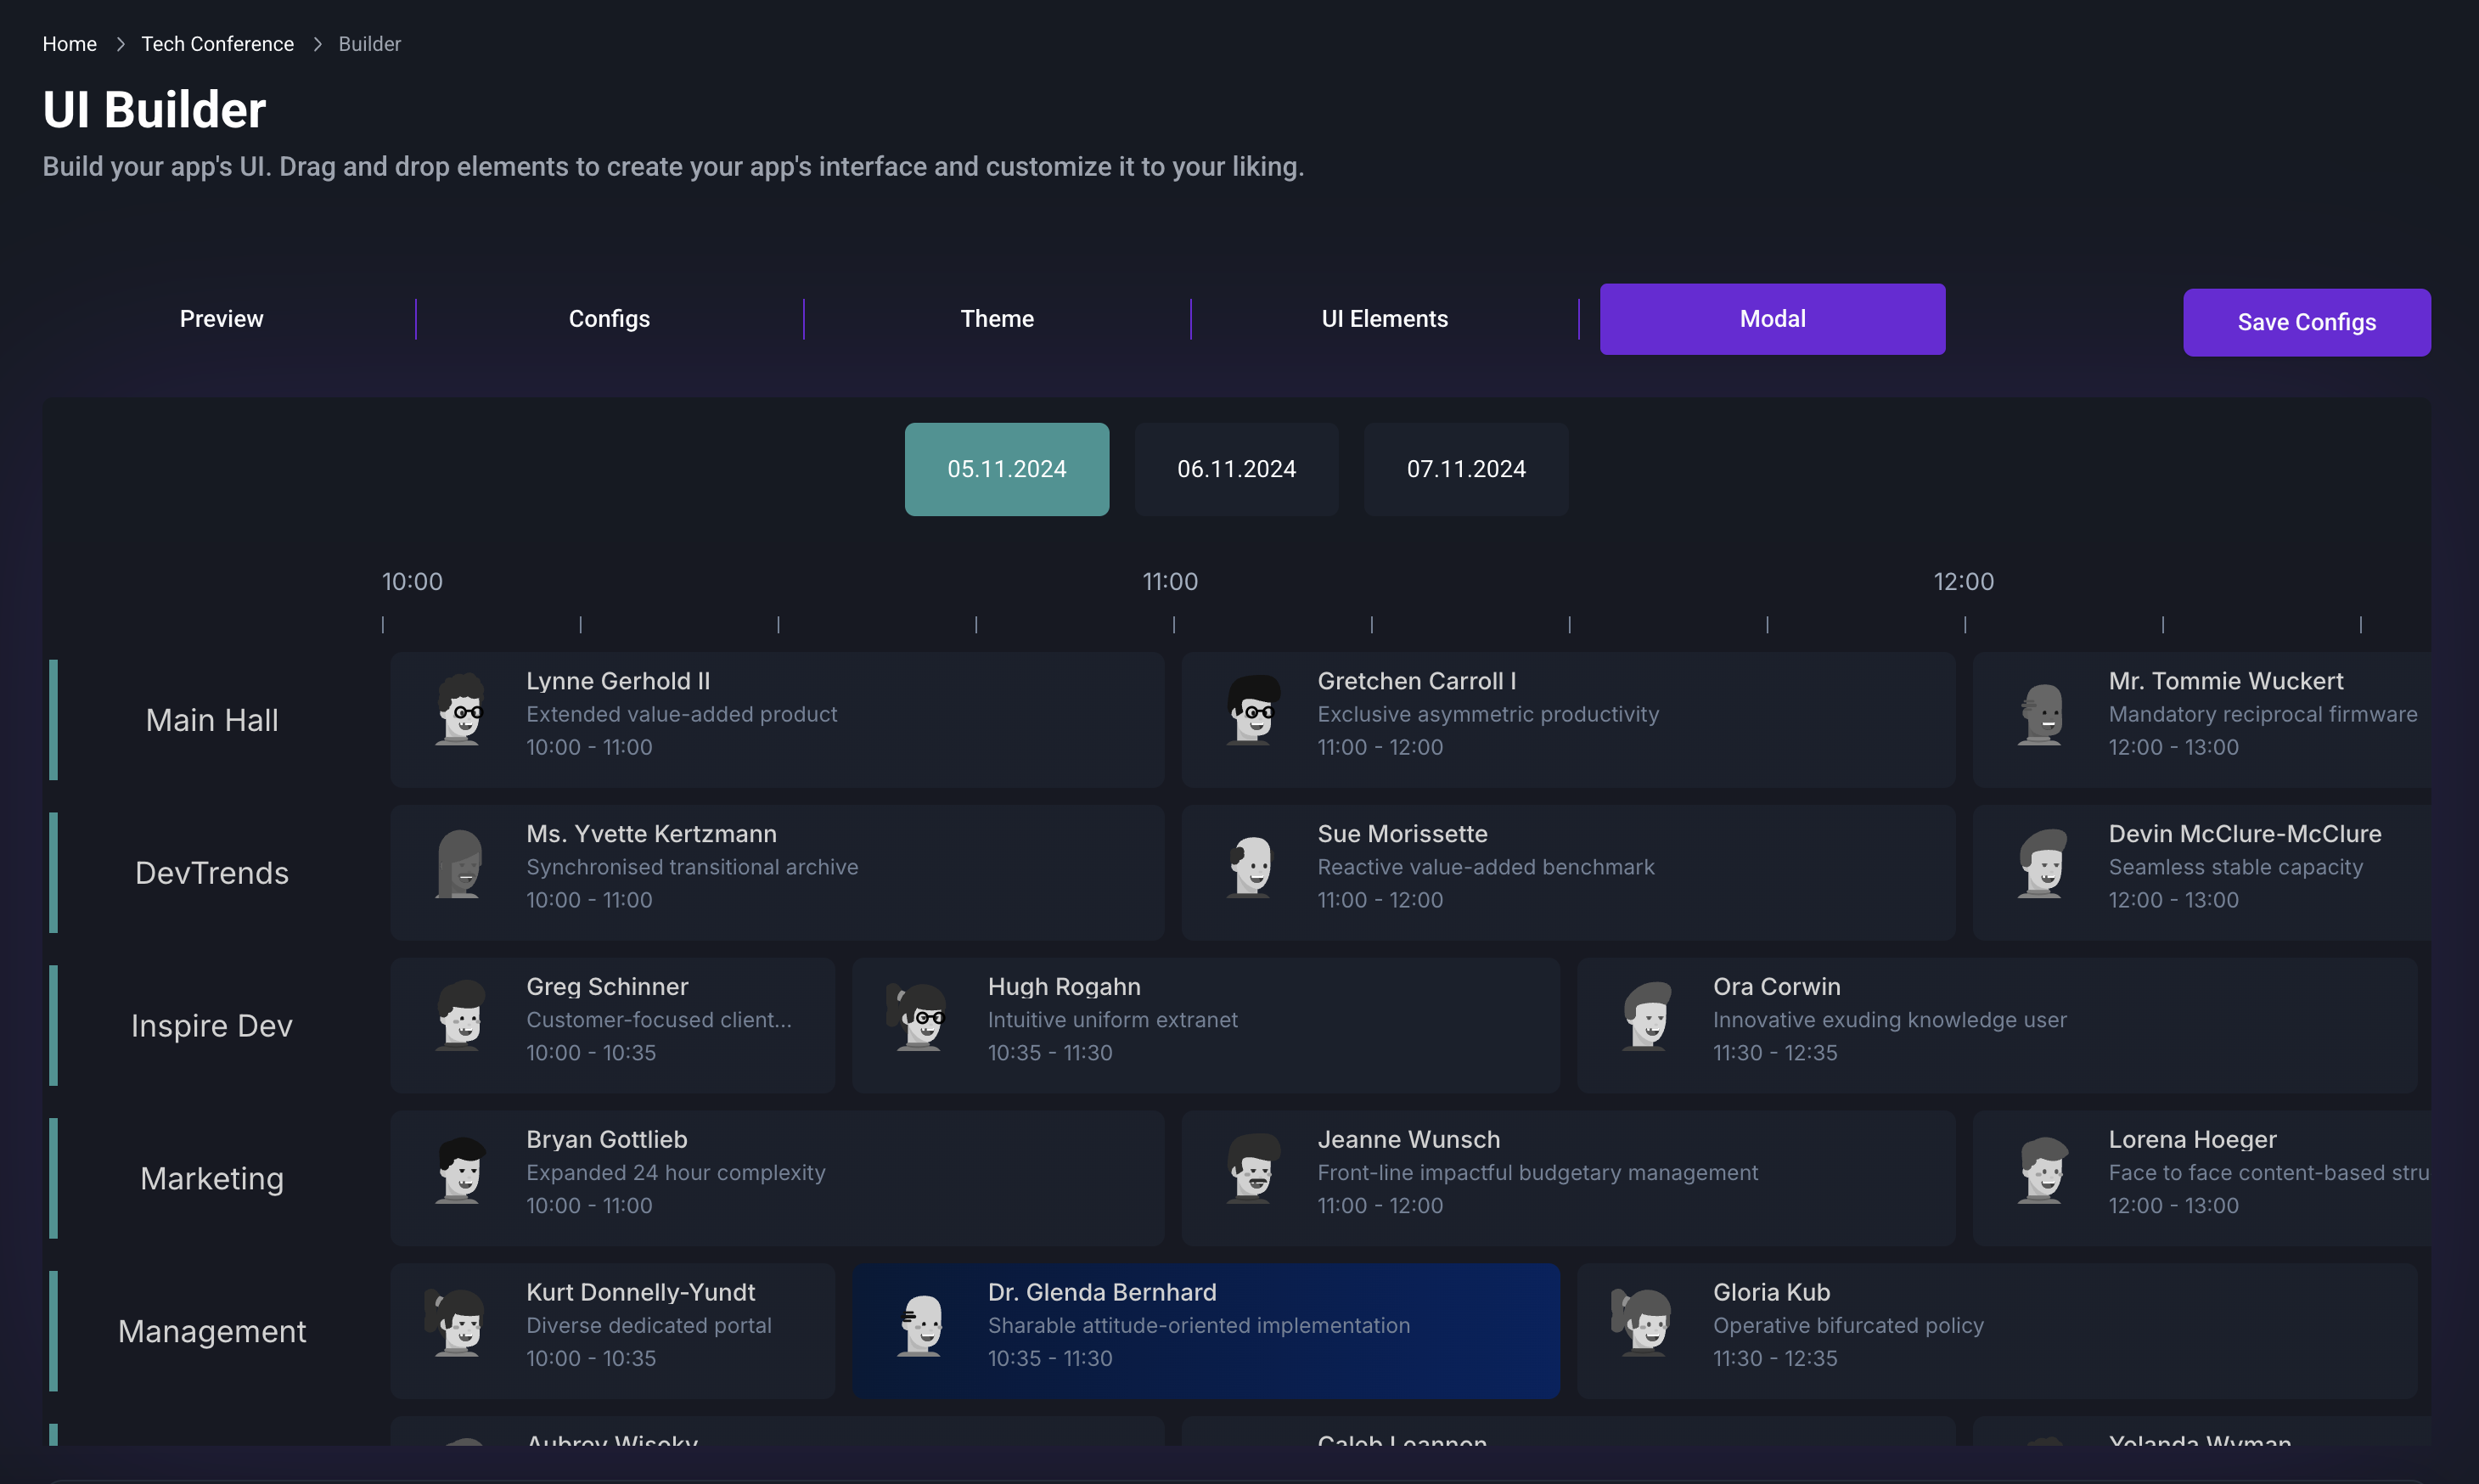
Step 4: Configure Dates in the Builder Tab
- Open the Builder tab.
- Enter your Start Date and End Date in the appropriate fields to initialize your application.
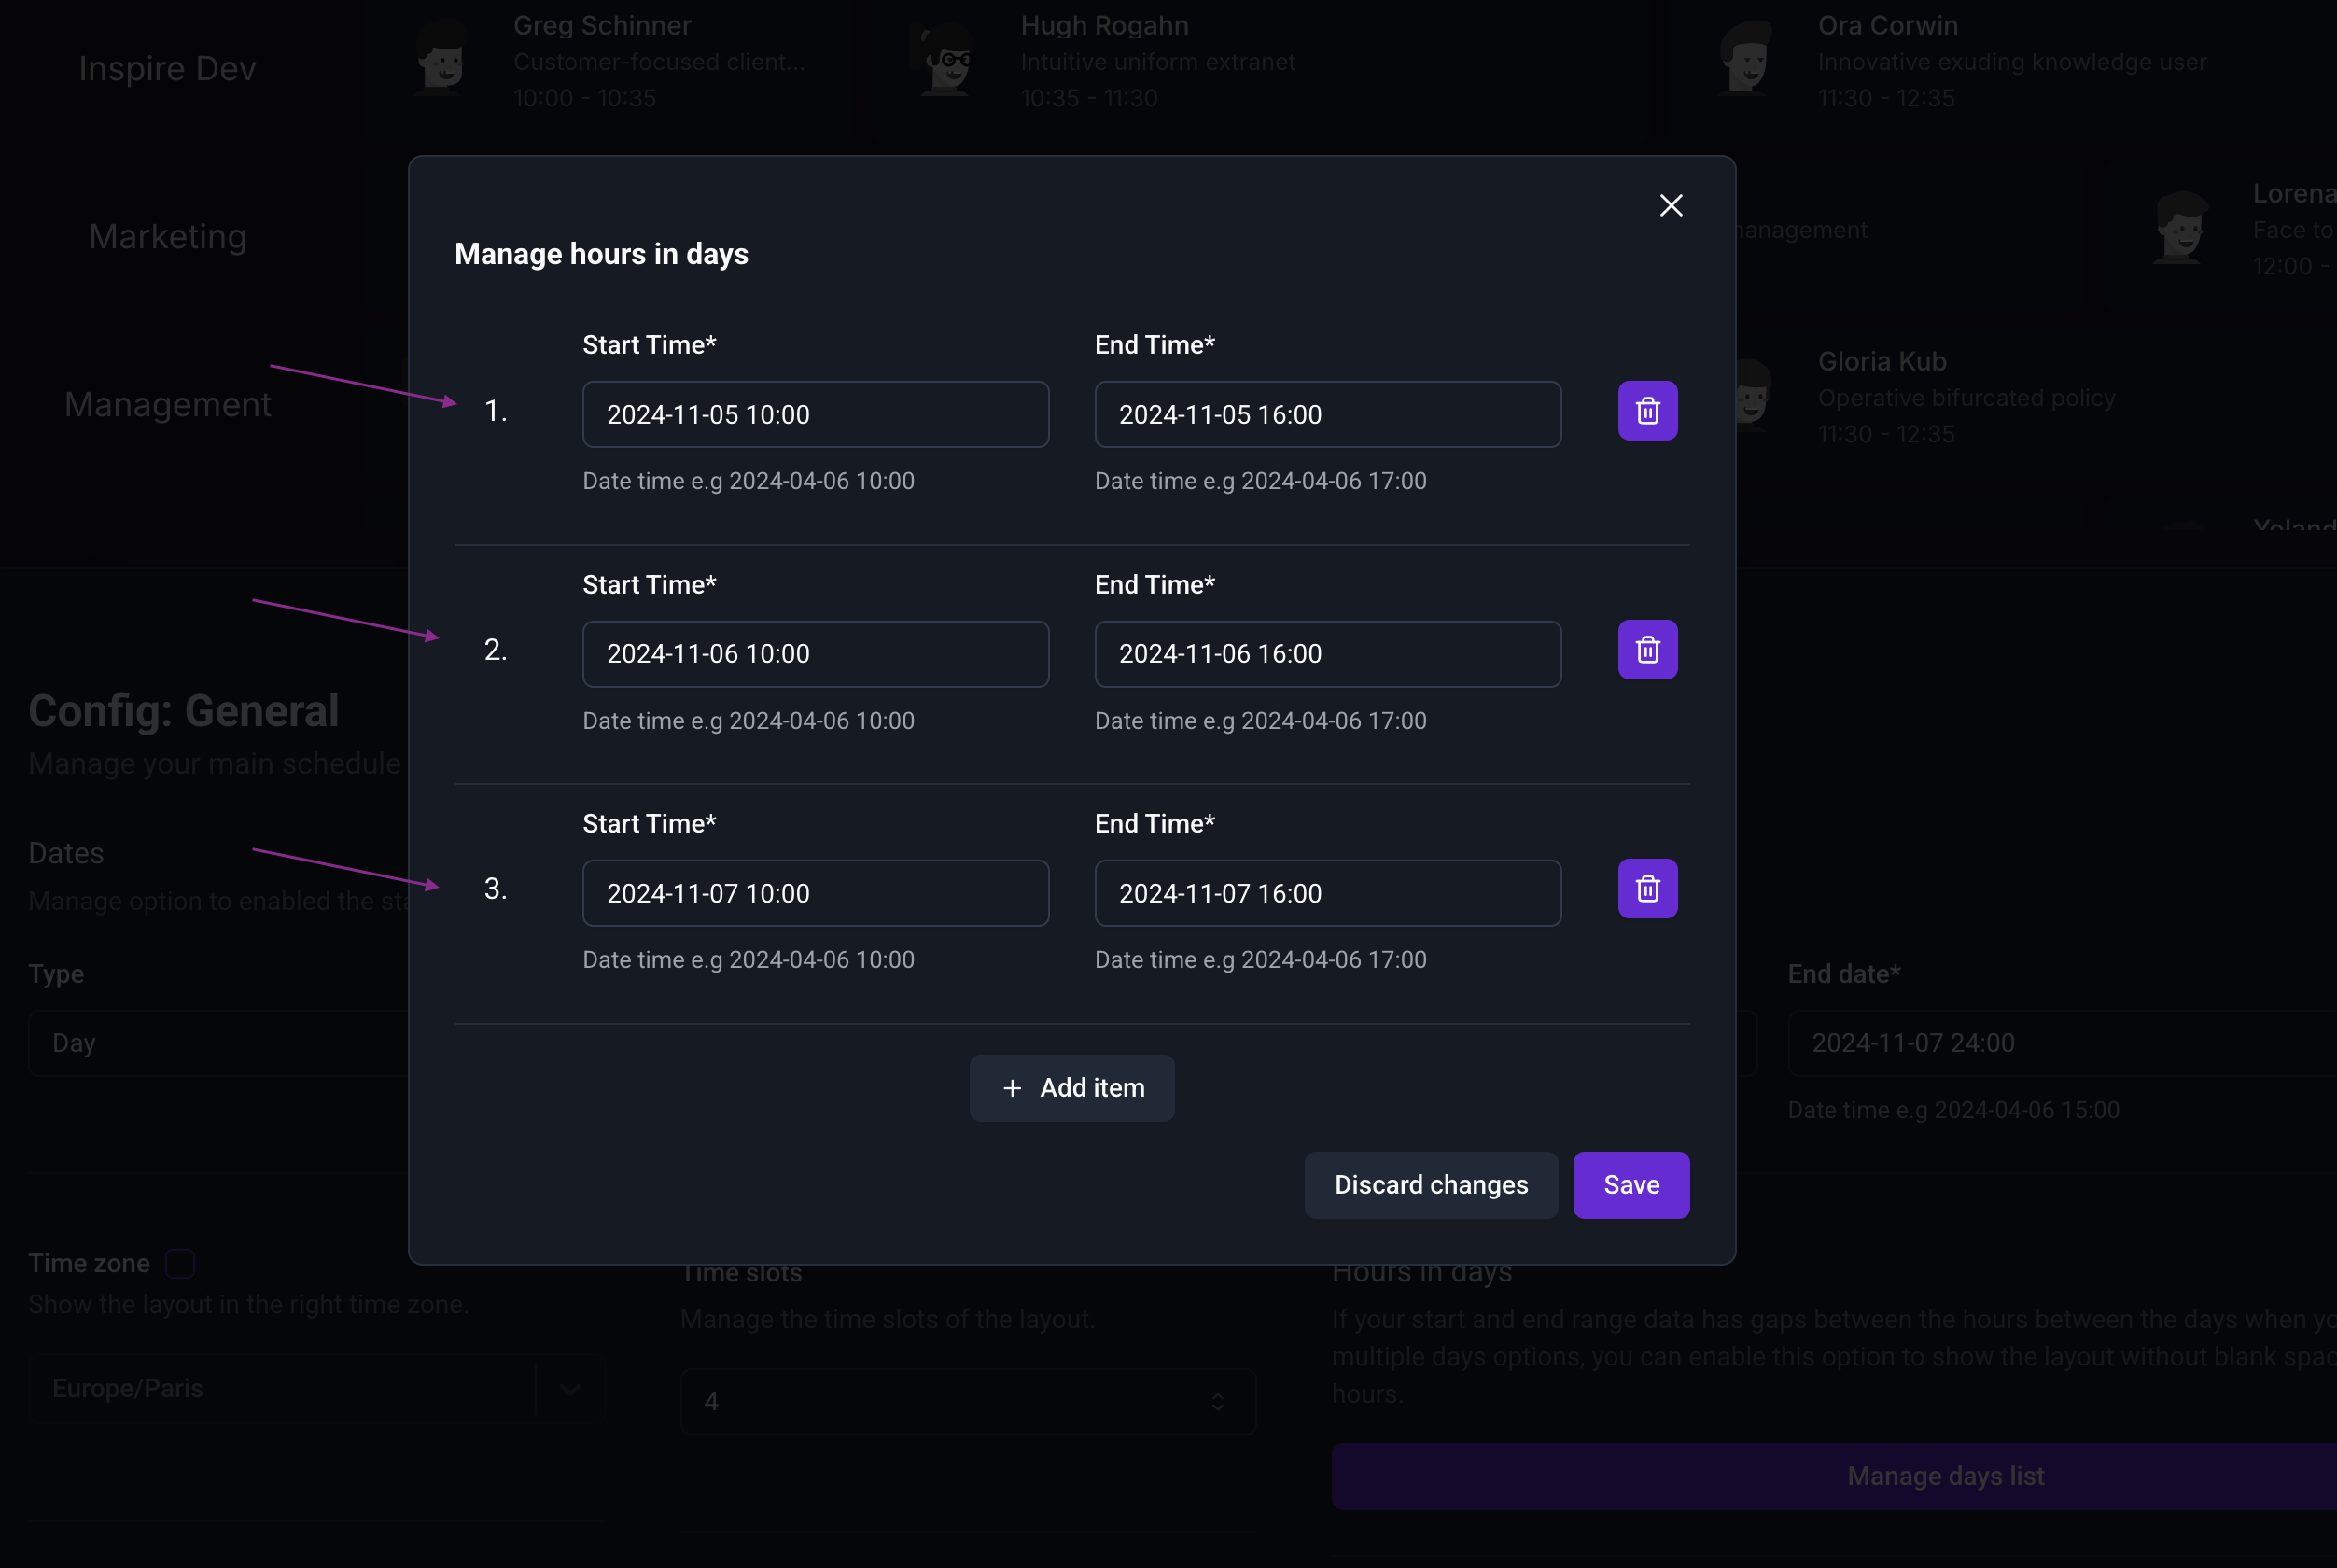
![]()

- start: 2024-11-05 10:00 end: 2024-11-05 16:00
- start: 2024-11-06 10:00 end: 2024-11-06 16:00
- start: 2024-11-07 10:00 end: 2024-11-07 16:00
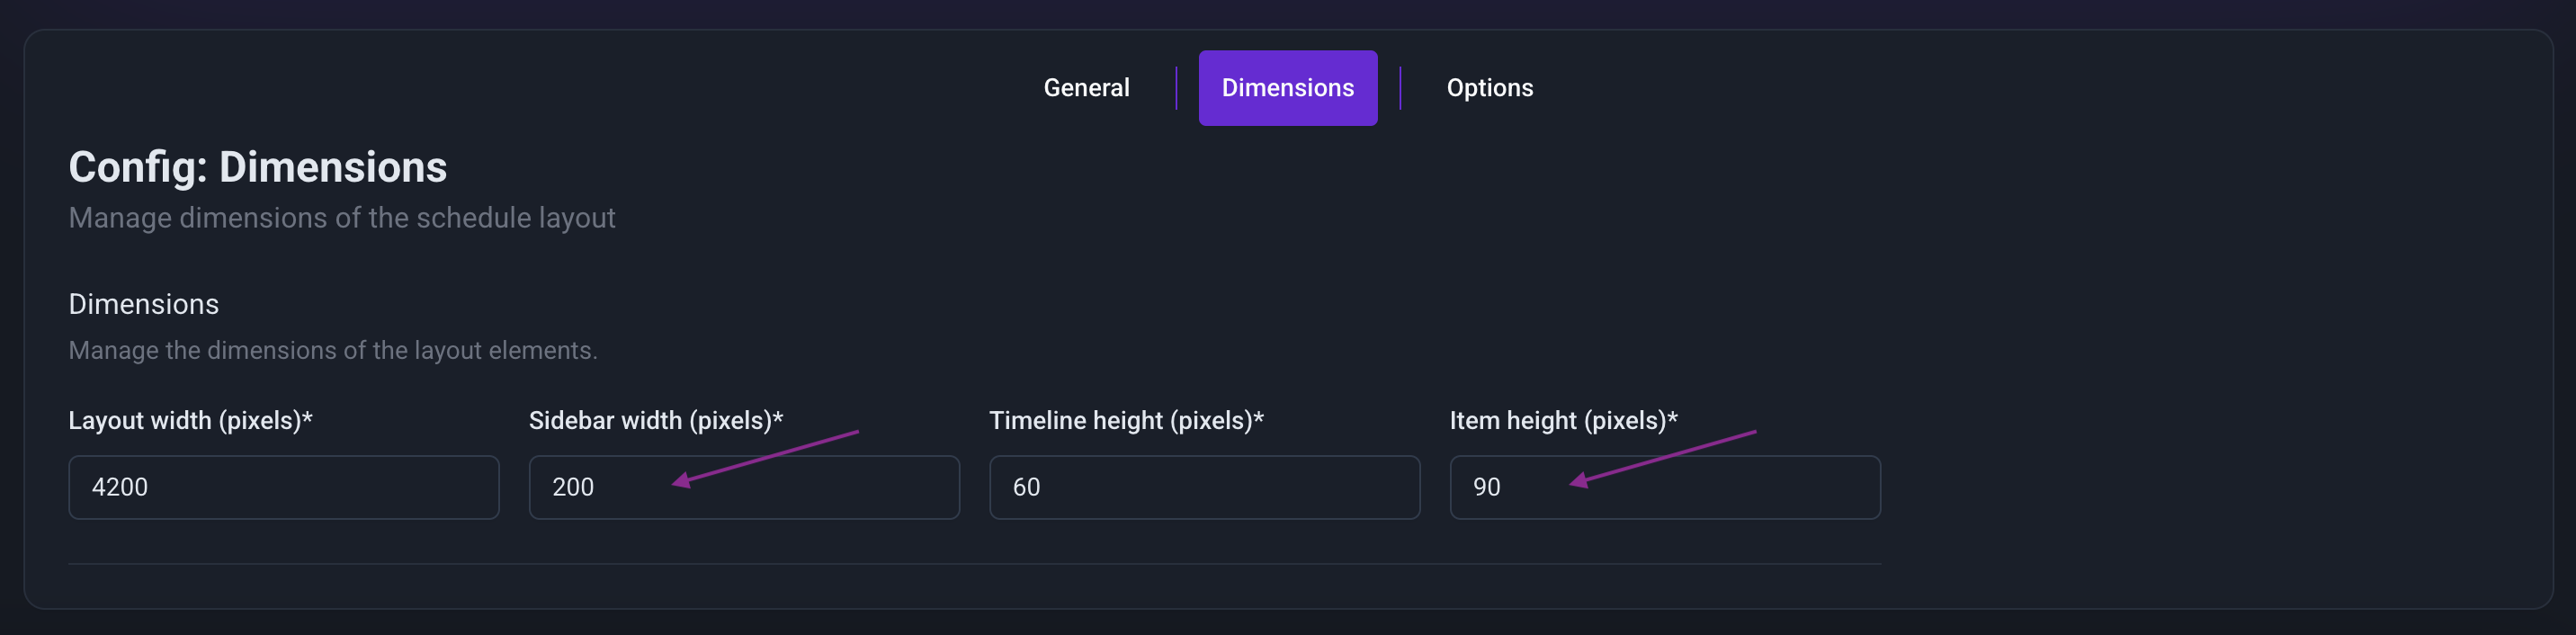
Step 5: Adjust Dimensions in the Dimensions Tab
- Navigate to the Dimensions tab.
- Change the sidebar width to 200px.
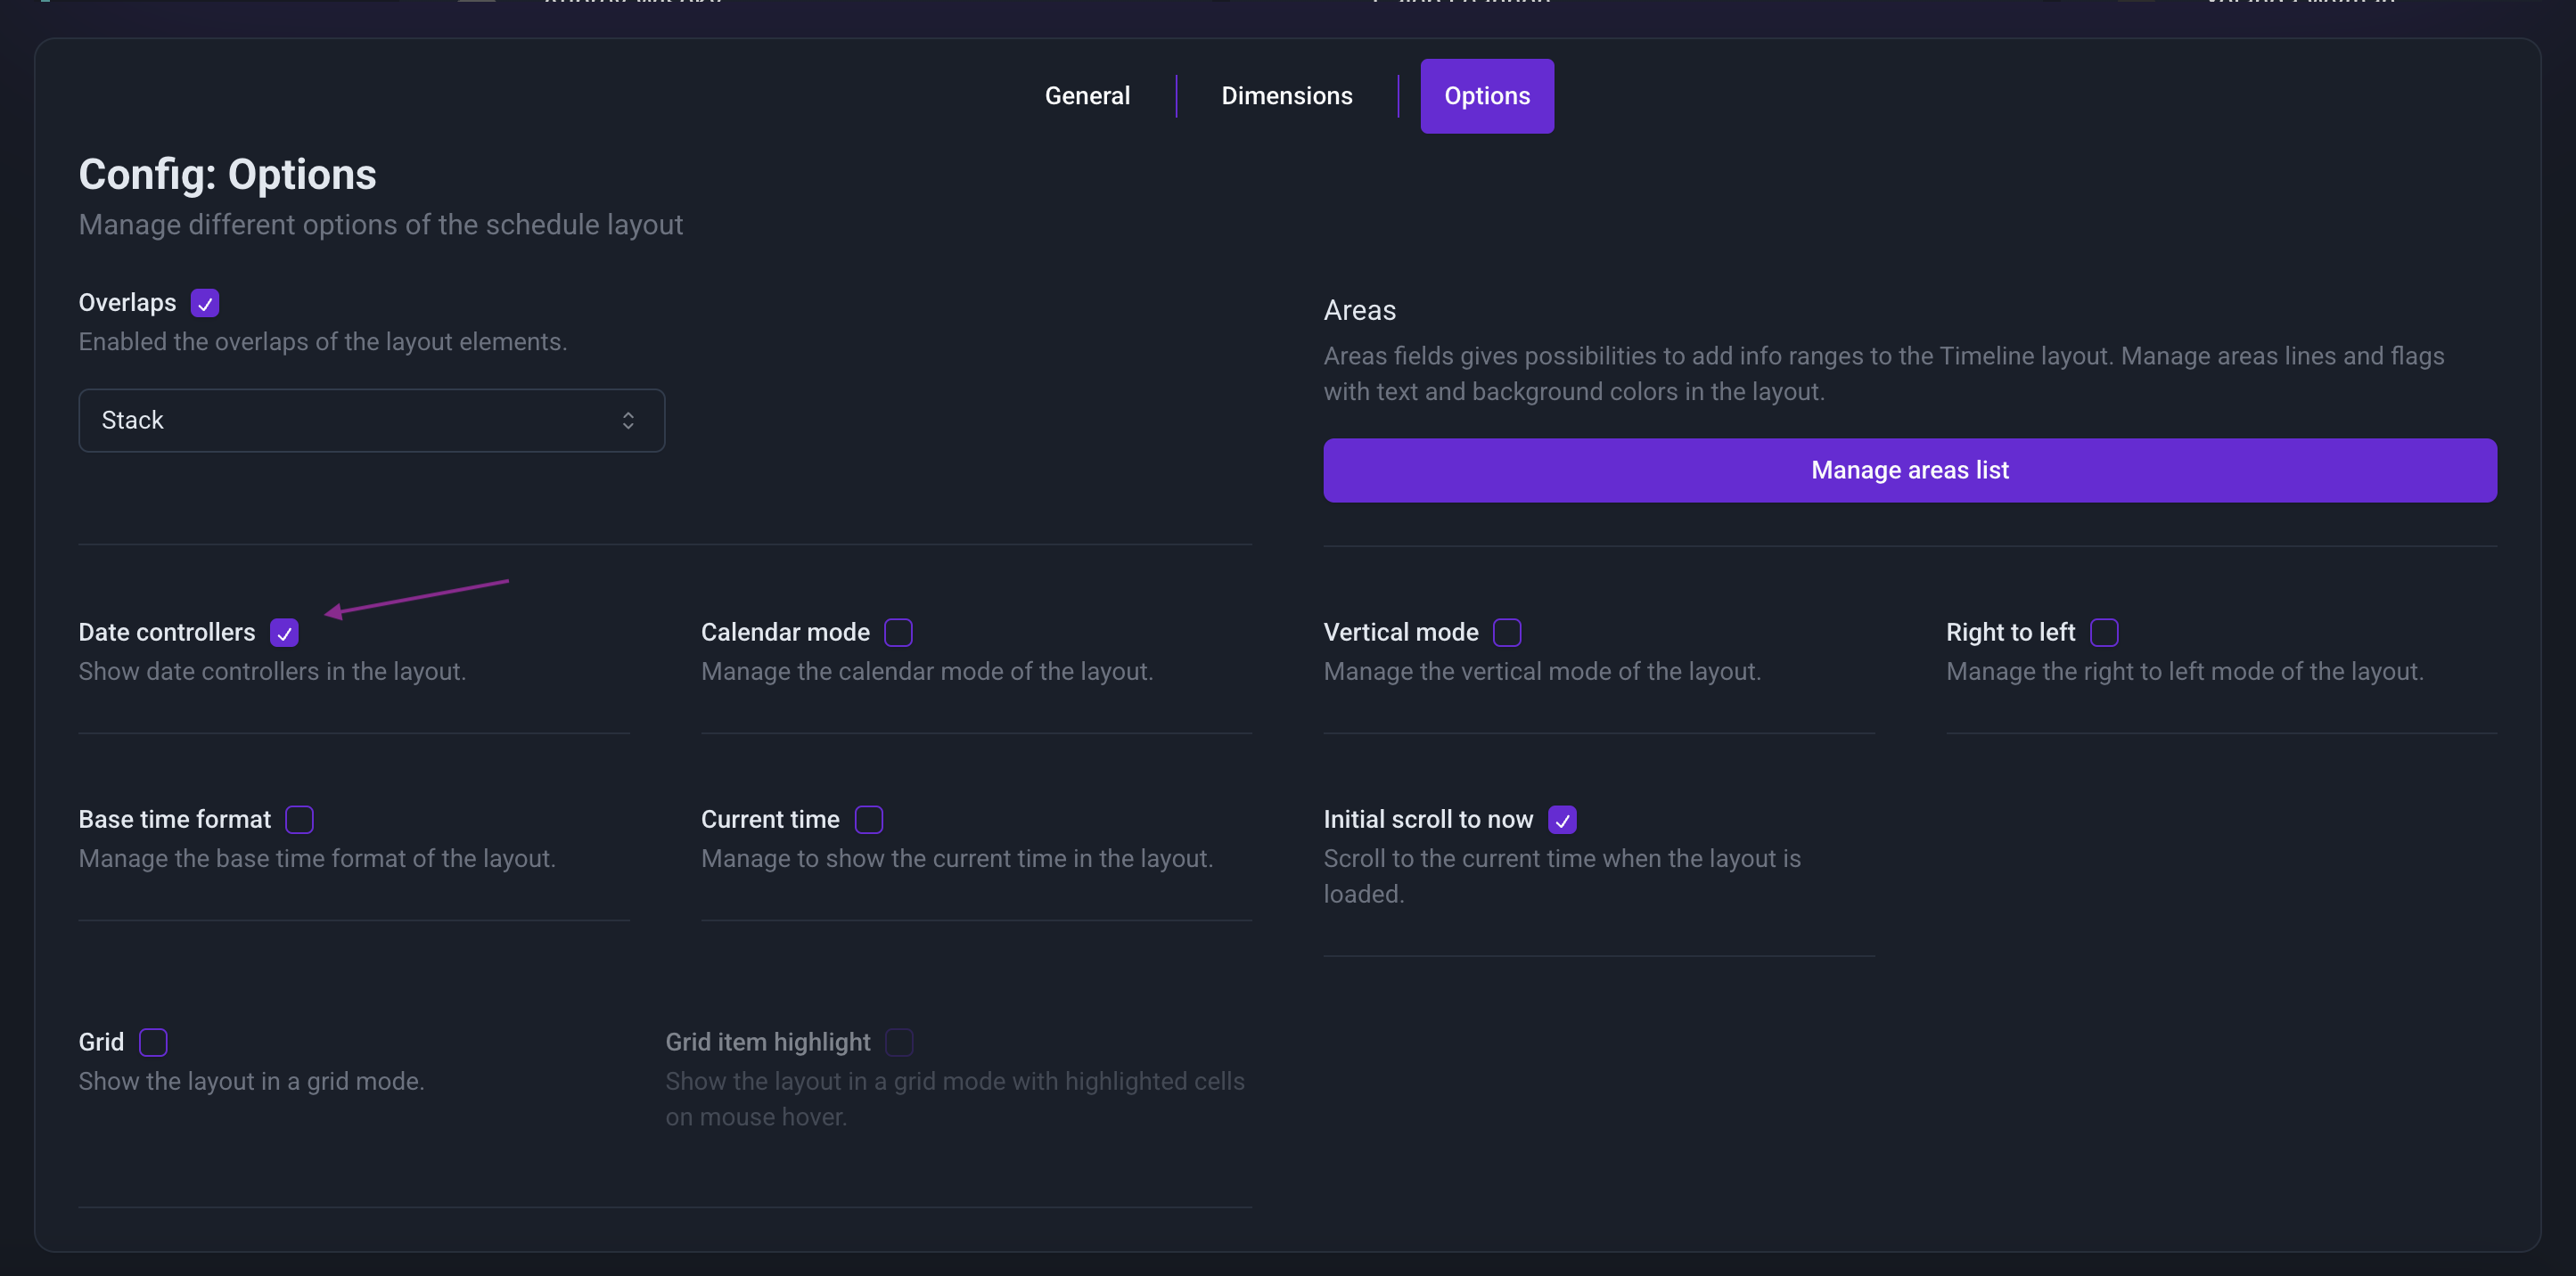
Step 6: Enabled date button control in the Options Tab
- Navigate to the Options tab.
- Enable the "Date controllers" option.
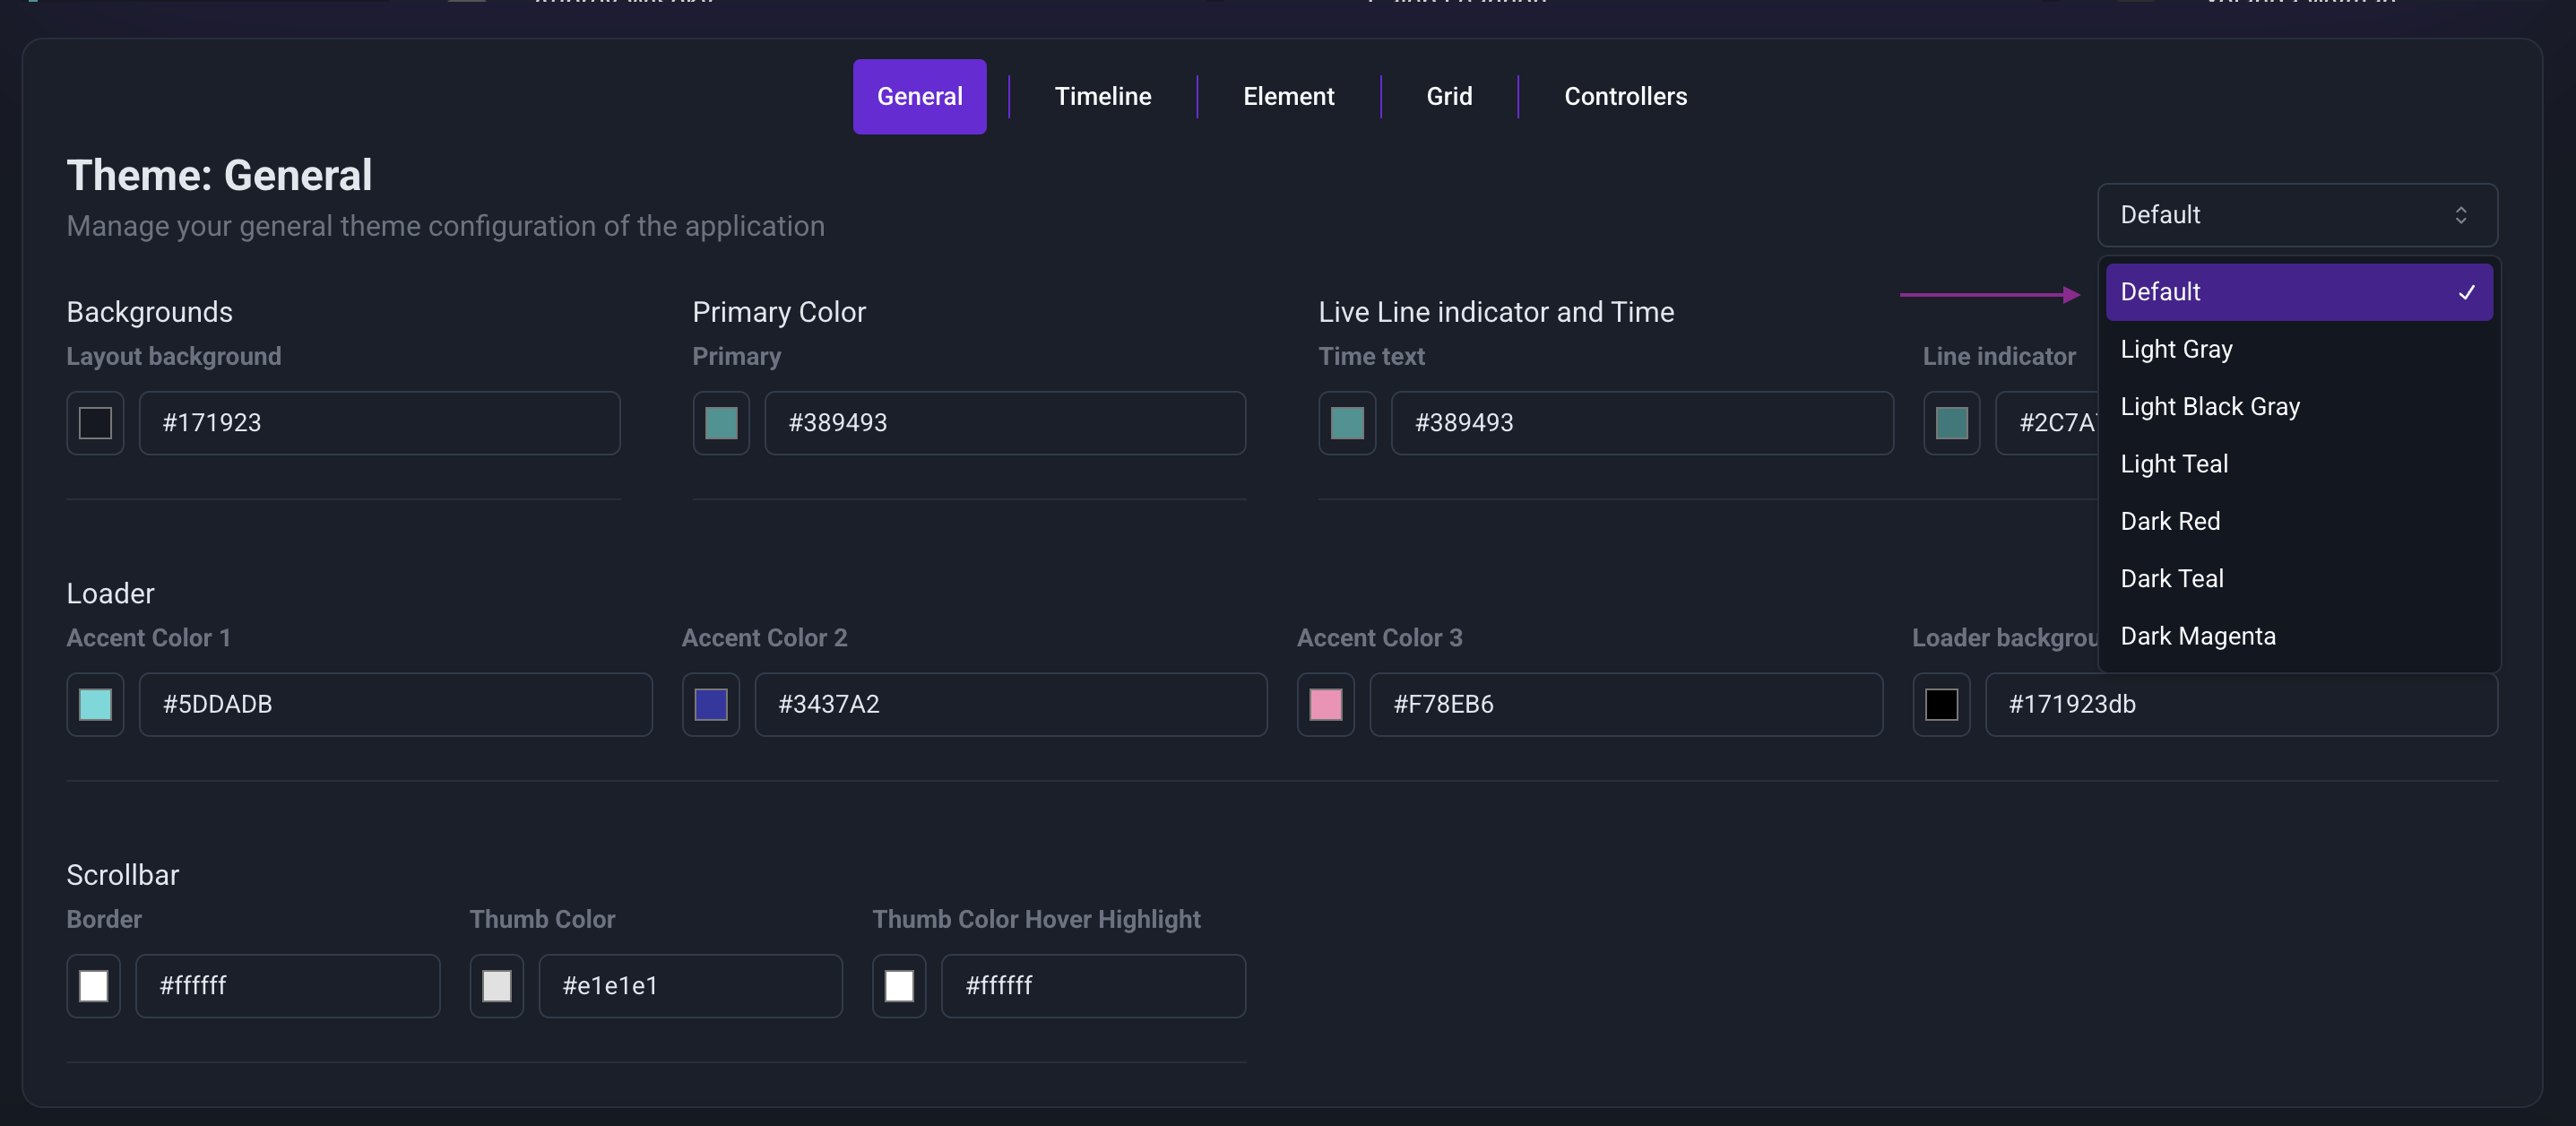
Step 7: Customize Theme in the Theme Tab
- Open the Theme tab.
- Select the pre-built theme named Magenta to apply it to your application.
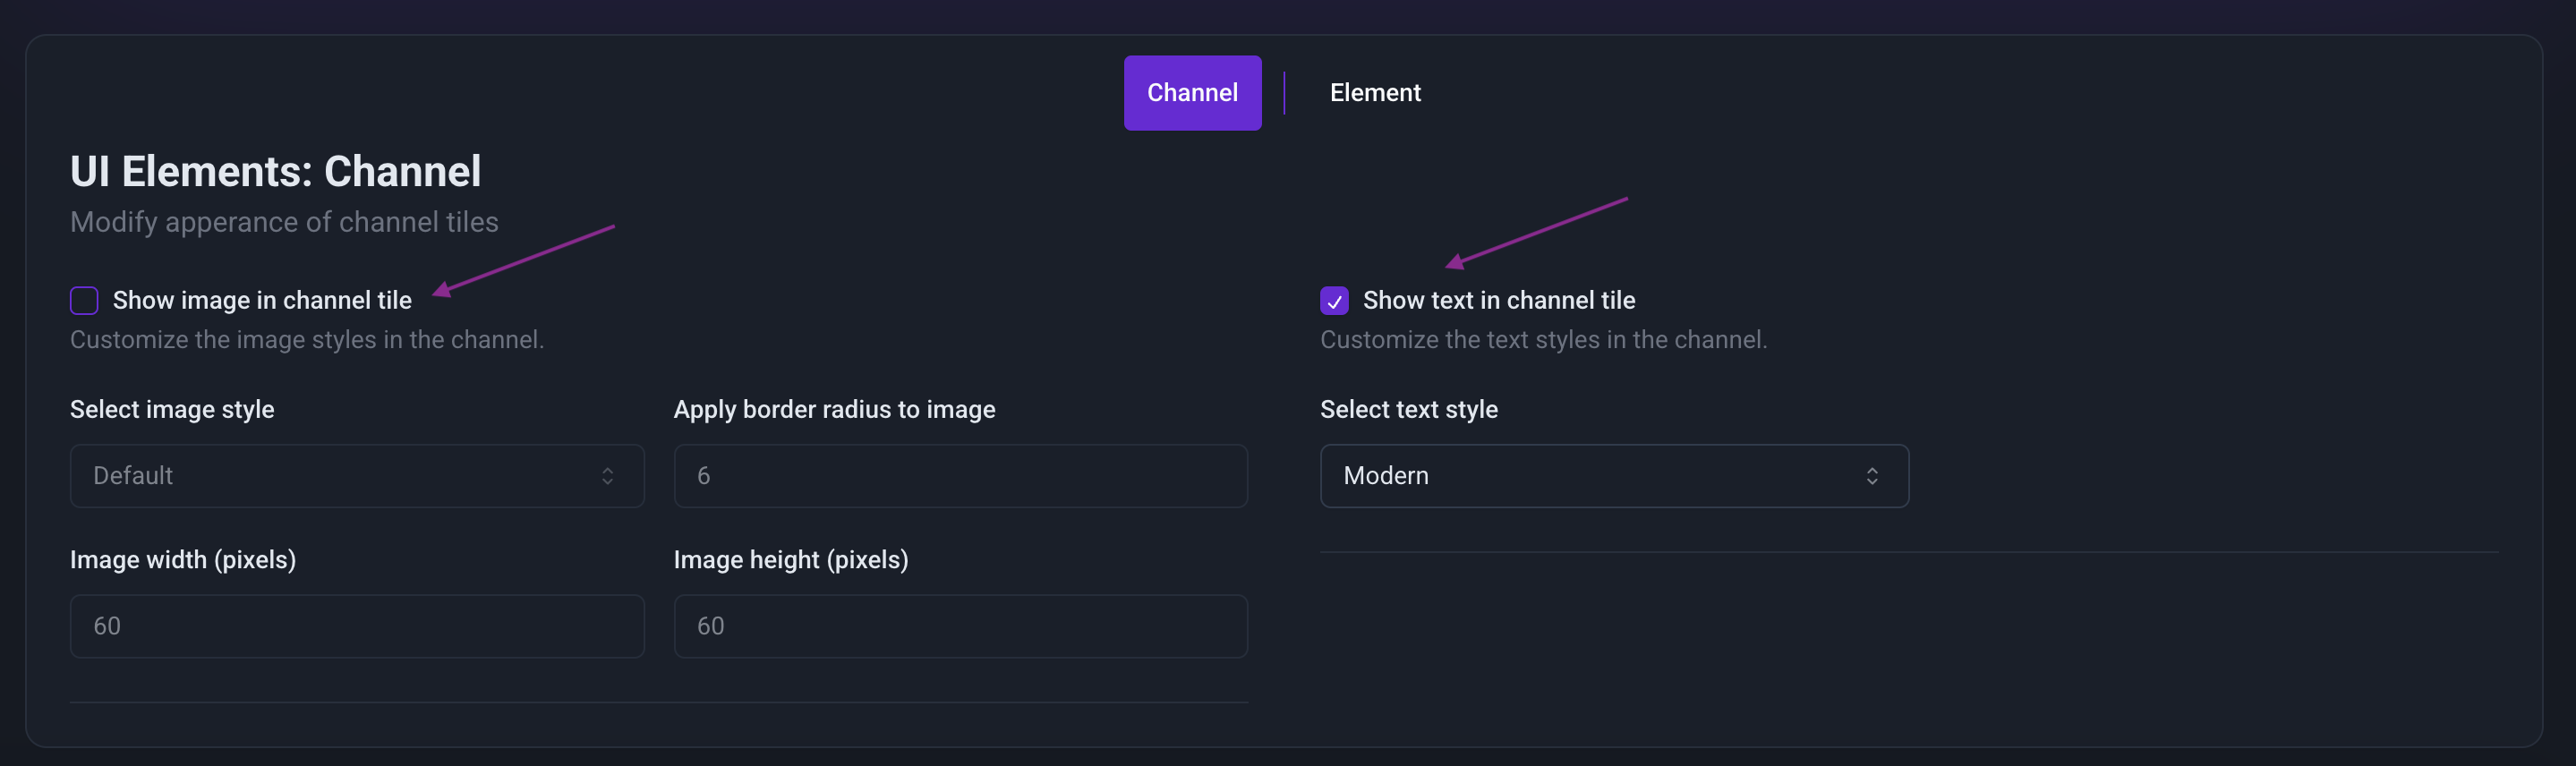
Step 8: Modify UI Elements in the UI Elements Tab
- Go to the UI Elements tab.
- Click the "Show text in channel" tile and disable the "Show image in channel" option.
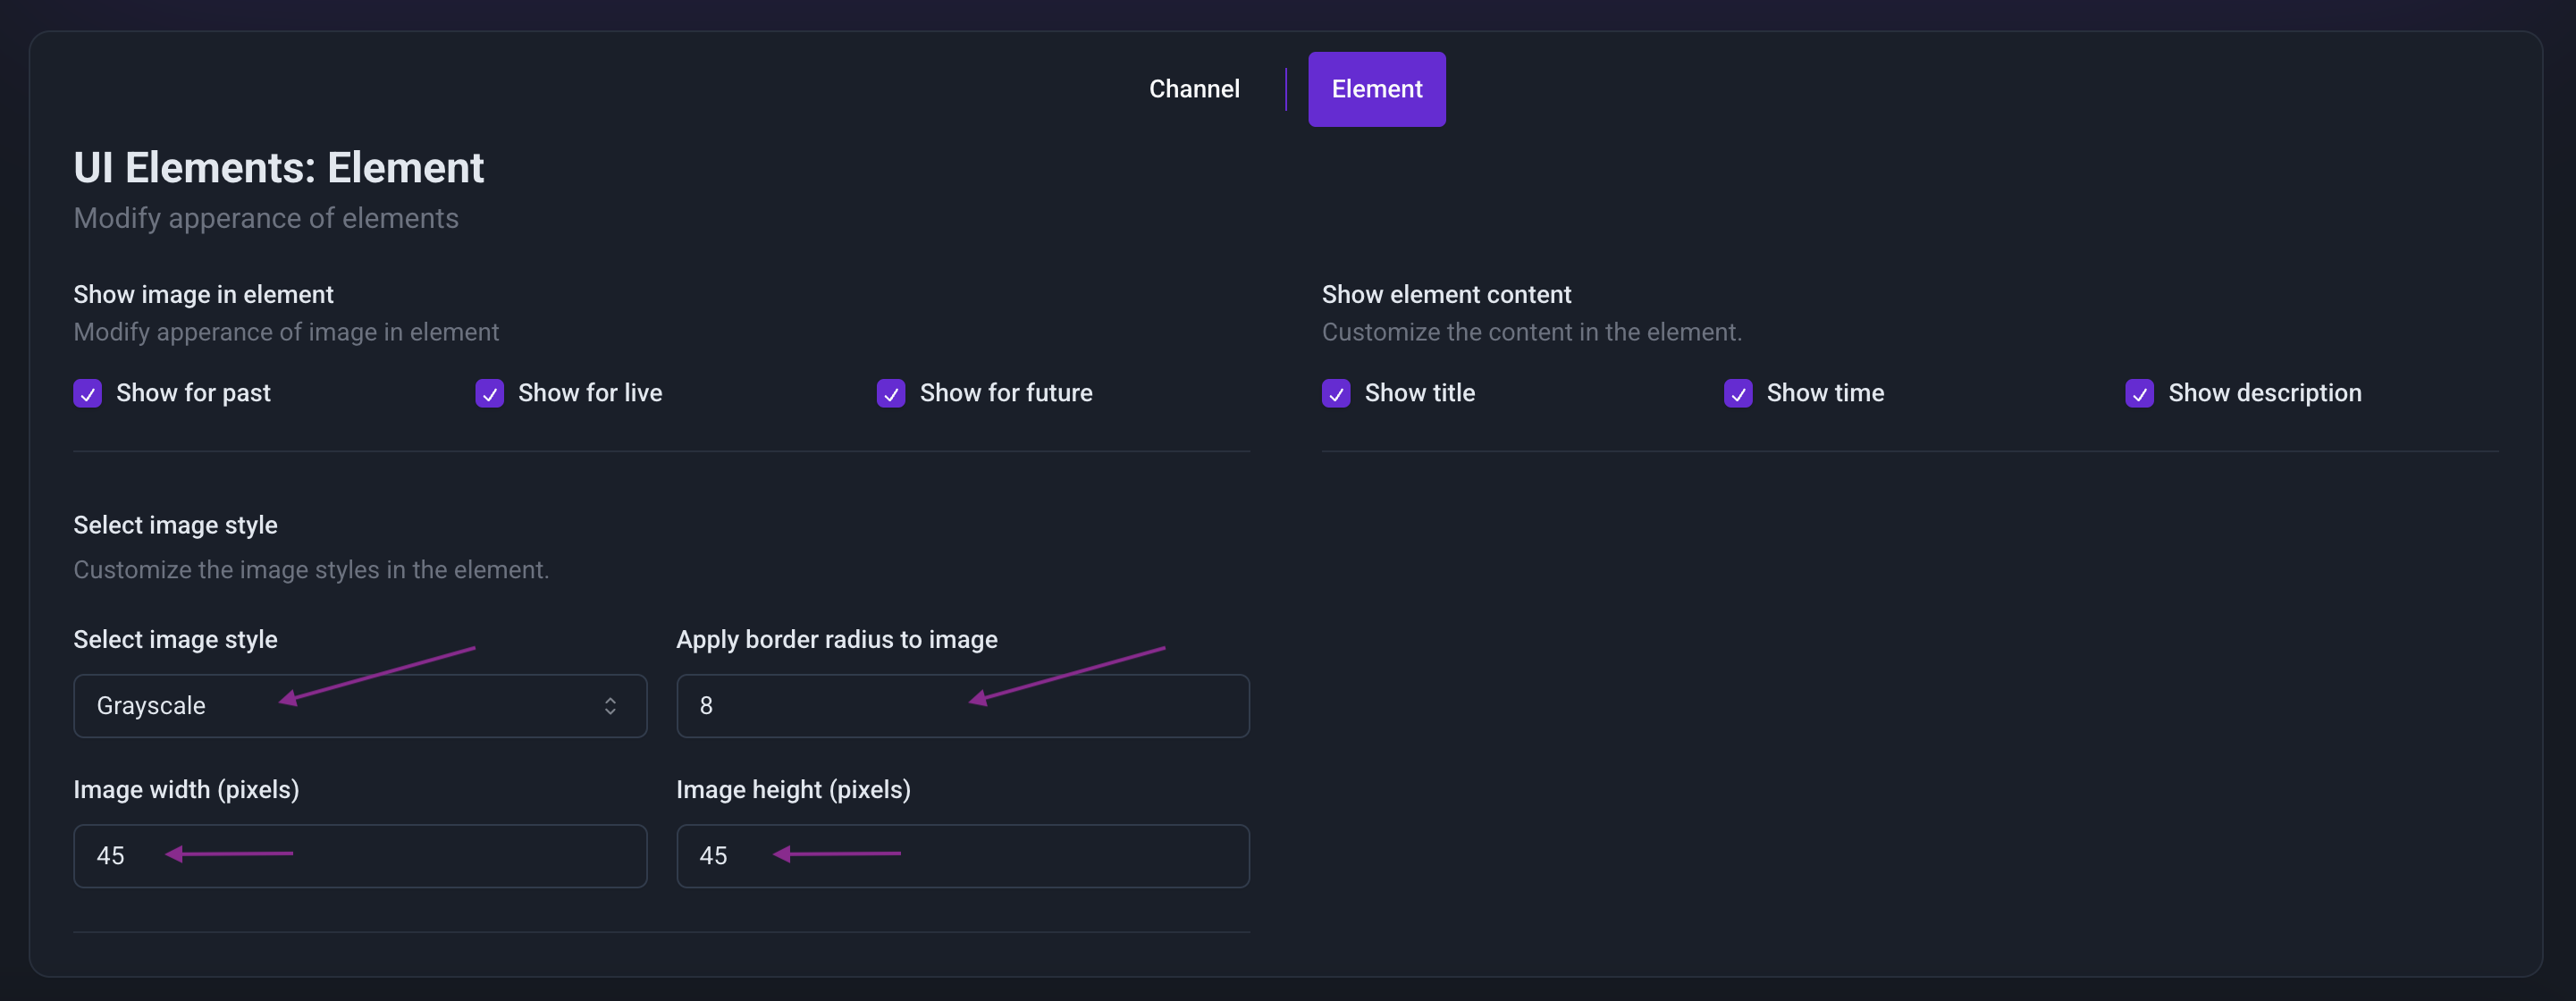
Step 9: Customize Elements in the Elements Tab
- Return to the Elements tab.
- Enable "Show image in element" for all variants.
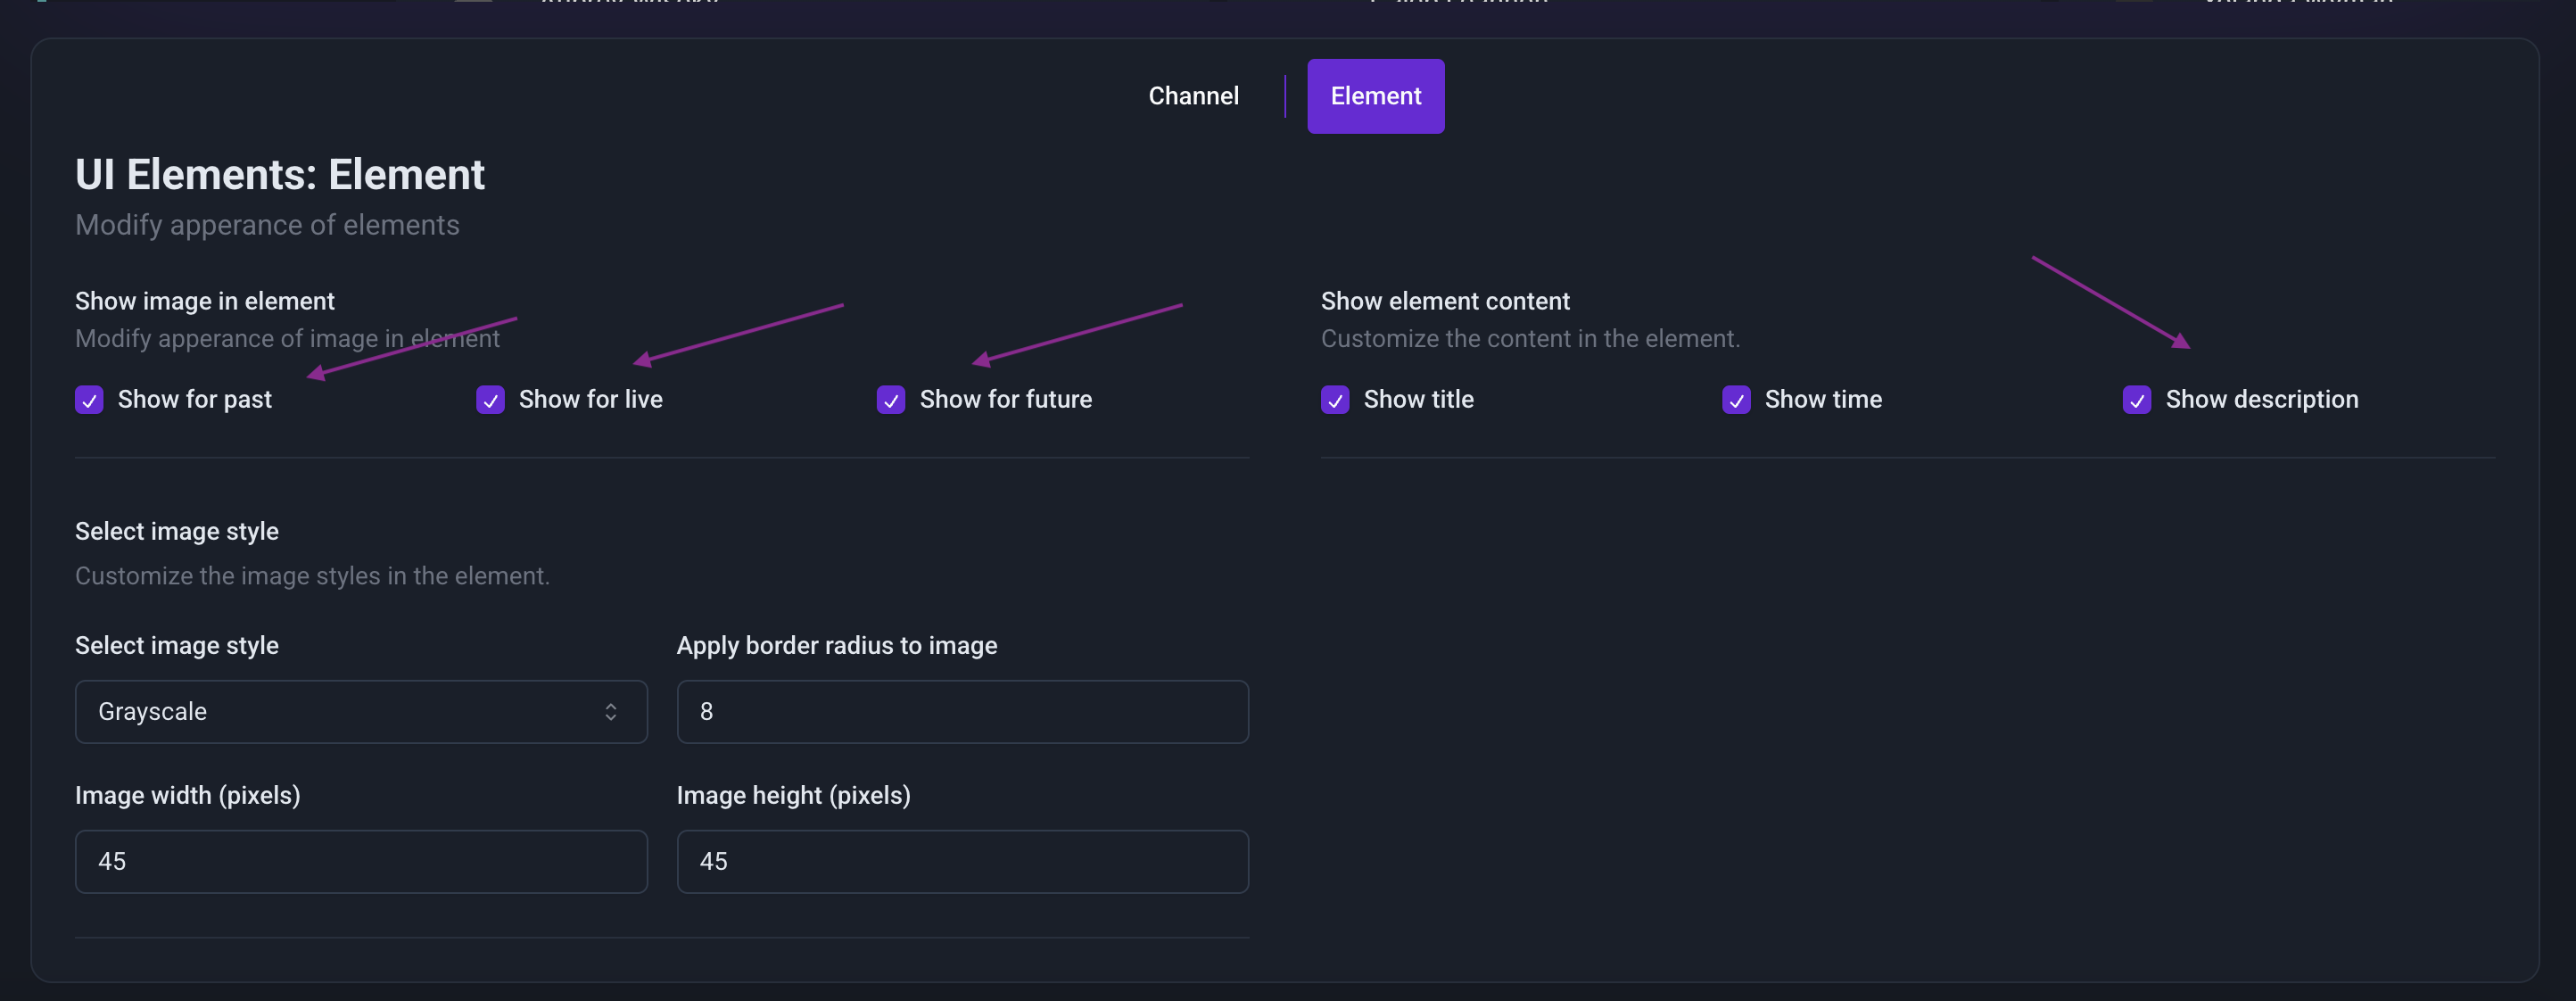
-
Adjust image properties:
- Set the image height to 40px and width to 40px.
- Change the border radius to 50 for a rounded appearance.
- Select the Gradient option for the image style.
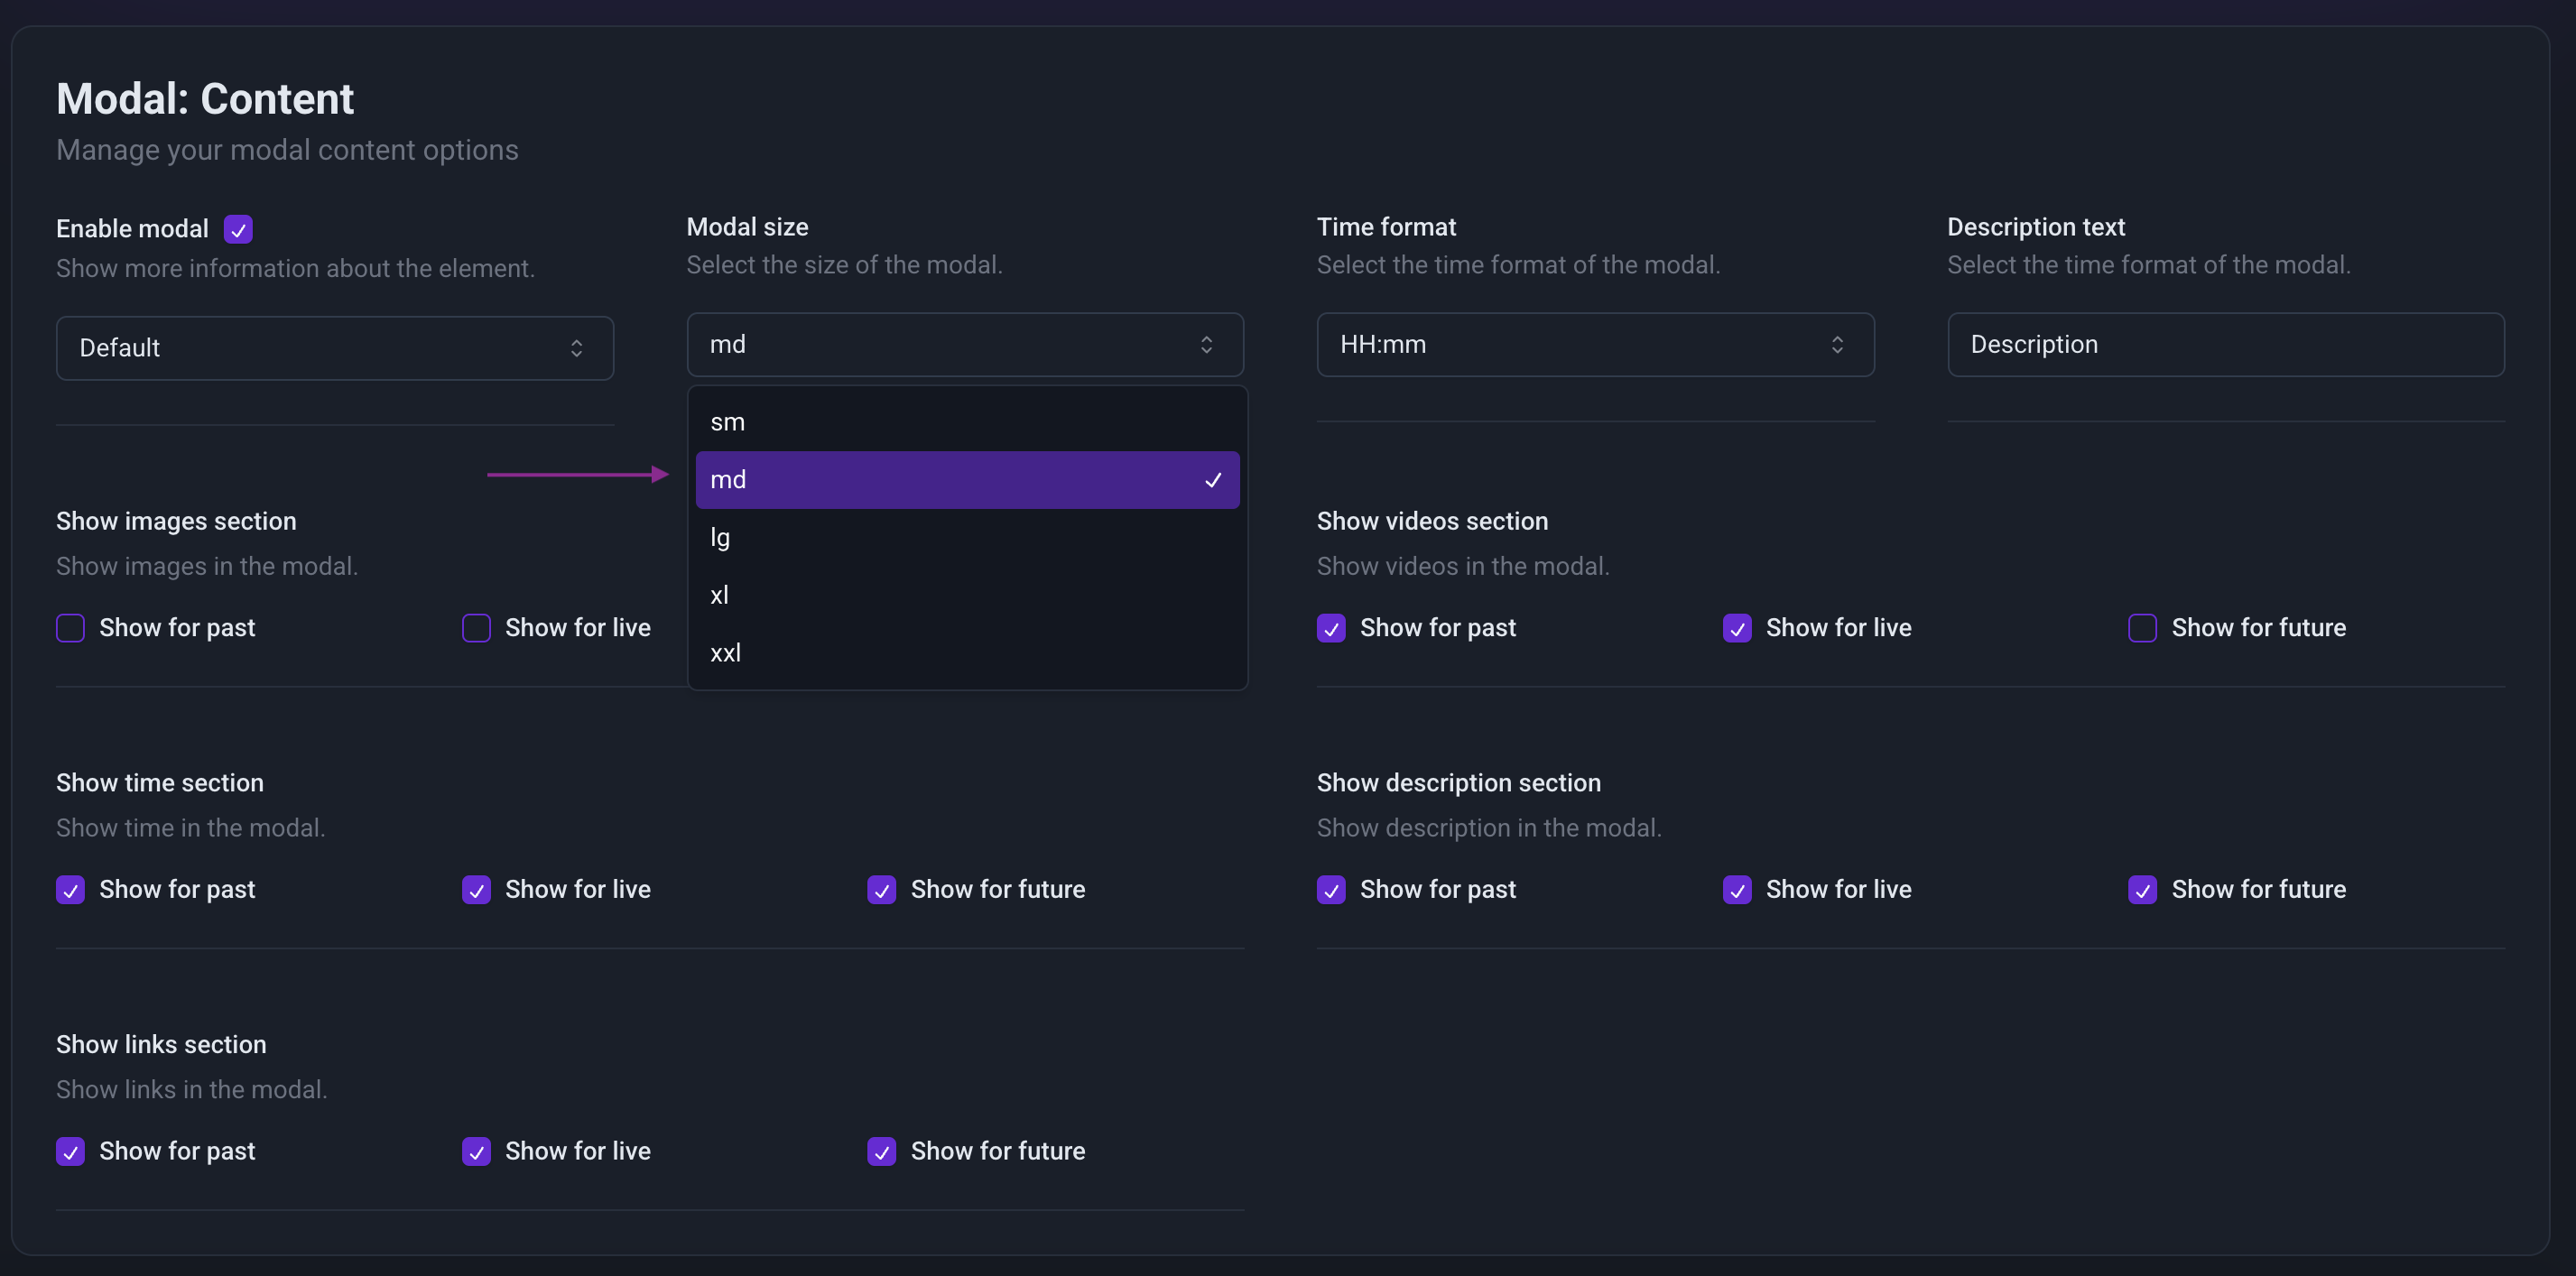
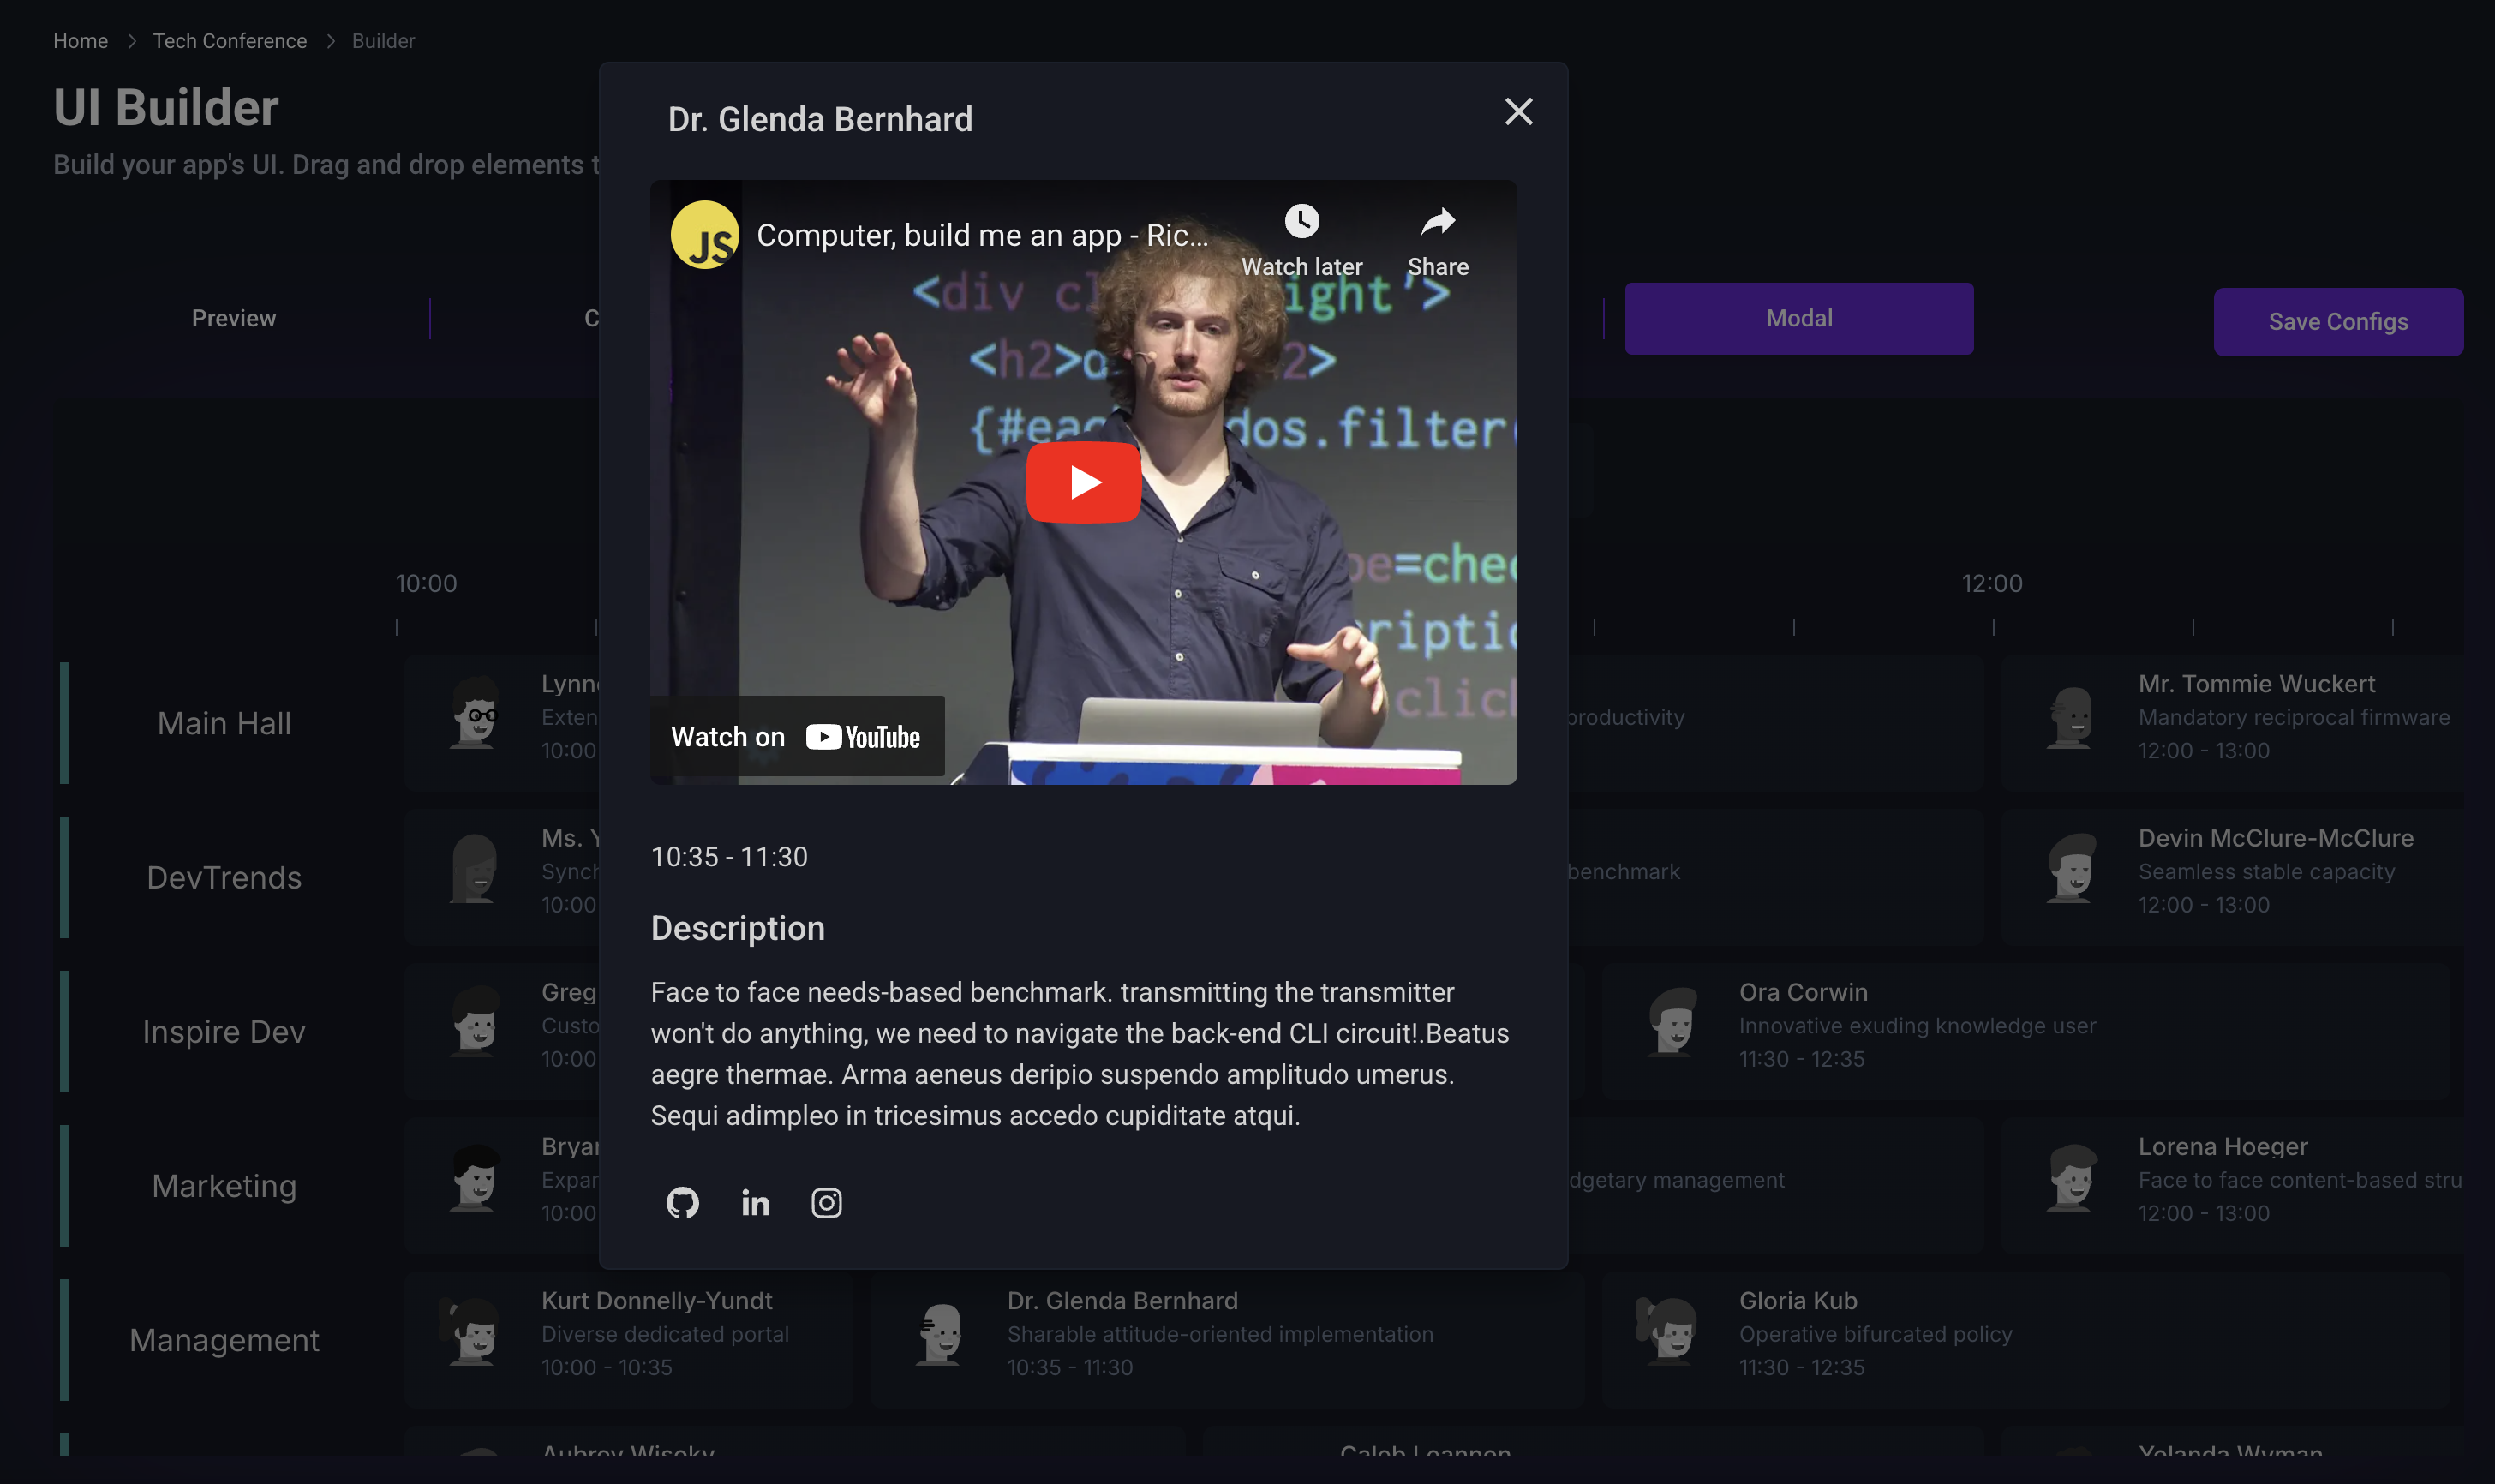
Step 10: Enable and Configure Modal in the Modal Tab
- Go to the Modal tab.
- Enable the modal by clicking the "Enable Modal" option.
- Enable the "Show images section" for all modal variants.
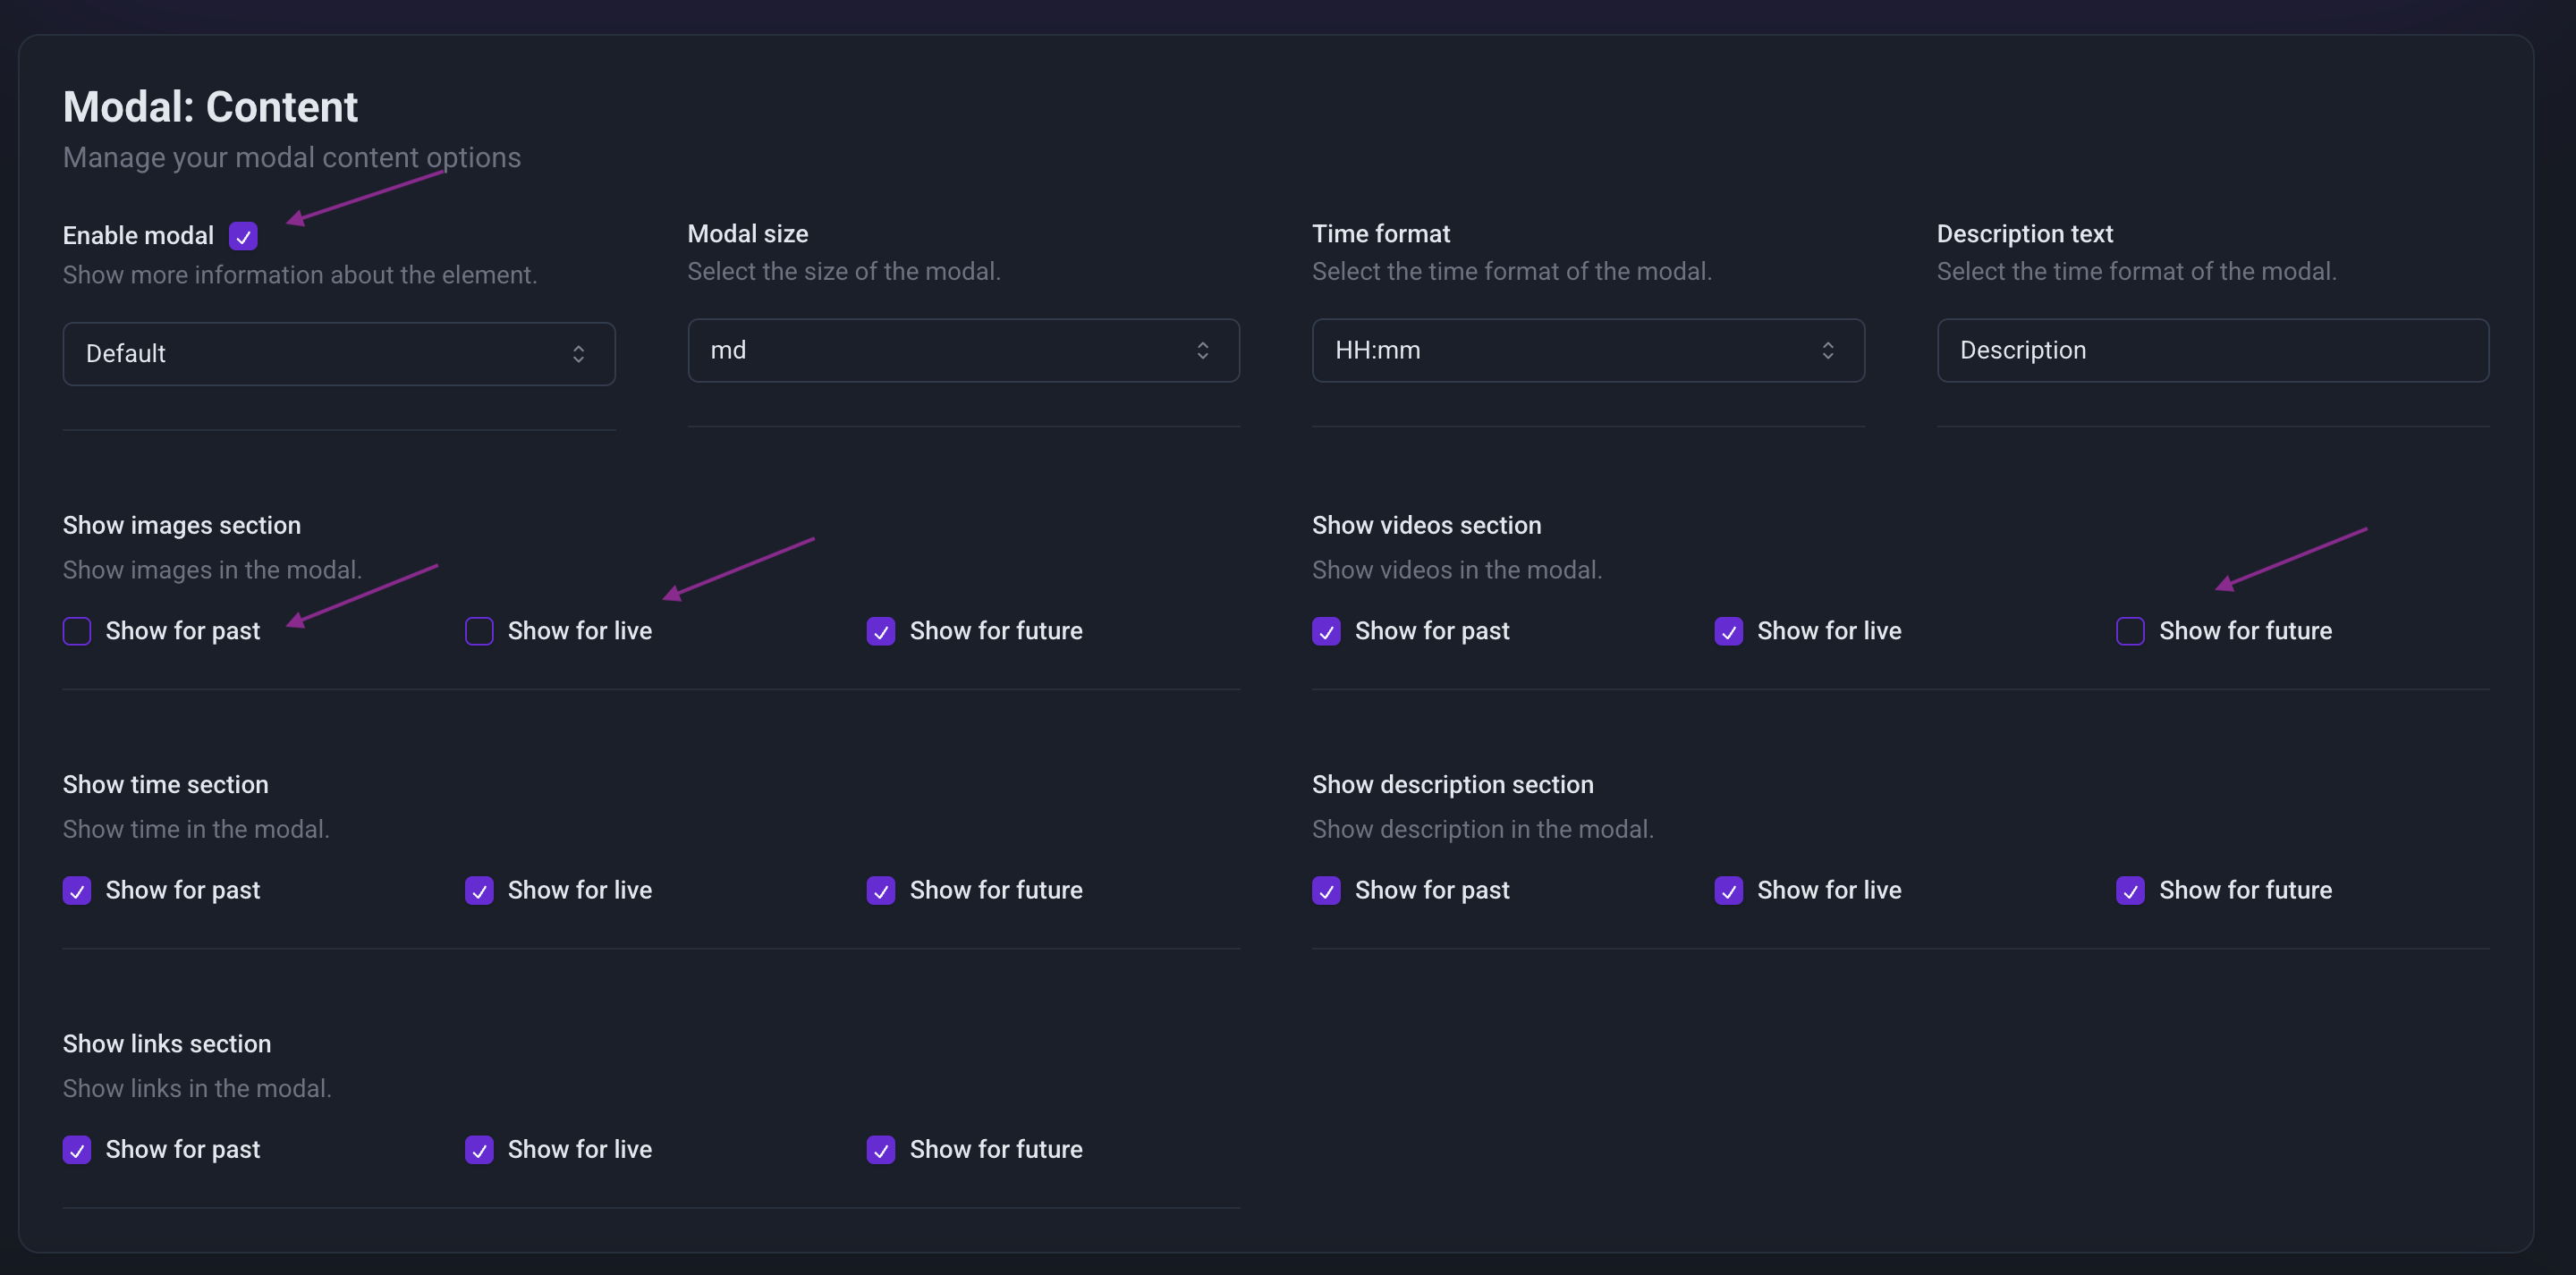
- Set the modal size to md (medium).
That’s It! 🚀
Your application is now fully customized and ready to use. Explore more advanced features and fine-tune your settings to make it truly yours!